Kitchen
How to Install a Kitchen Tile Backsplash: From Wall Prep to Grout
by Andrew Saladino
June 30, 2024
Although your kitchen backsplash may feel like an afterthought during the design process, it should be anything but. The backsplash helps tie together every aspect of your kitchen ? from your cabinetry and countertops to flooring and hardware selections. This simple update can magically elevate the appearance of your kitchen. And the best part? Installing a tile backsplash is the perfect project for both beginners and regular DIYers. With a little bit of knowledge and knowhow, you can create an inspiring backdrop to your kitchen that infuses your personality into the space.
If you’re new to the do-it-yourself world, you may be nervous to get started on this project. But never fear, the team at Kitchen Cabinet Kings has put together a helpful guide that covers how to install a tile backsplash, including everything from wall prep to grout so you can feel confident tackling this project on your own.
Step 1: Measure the Wall
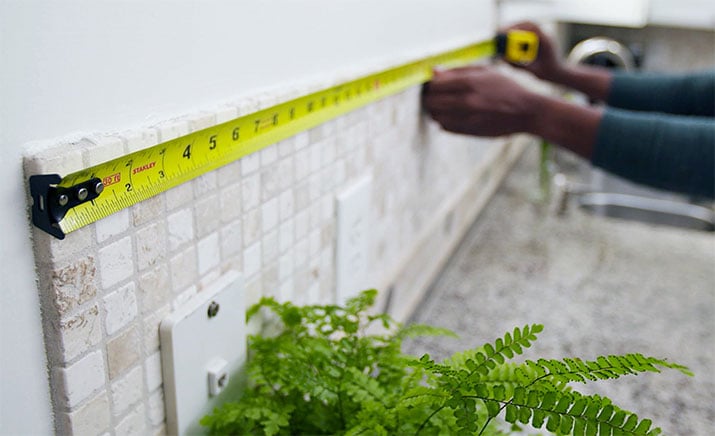
After spending countless hours perusing Pinterest and remodeling magazines for the perfect backsplash tile, you’ve finally narrowed it down to a winner. That means it’s time to determine how much tile you need in order to complete the job. To determine how much you need, you need to measure the height and width of the wall where the tile is going to be applied. Take into account any obstacles such as outlets or corners that may impact your final numbers. Double (and triple) check your measurements for accuracy ? there’s nothing worse than getting into the groove of the project only to find out you don’t have enough tiles on hand to complete the project. We always recommend purchasing 10% more than you need as a buffer to account for miscalculations, cuts, mistakes, or any other issues that may crop up throughout the project.
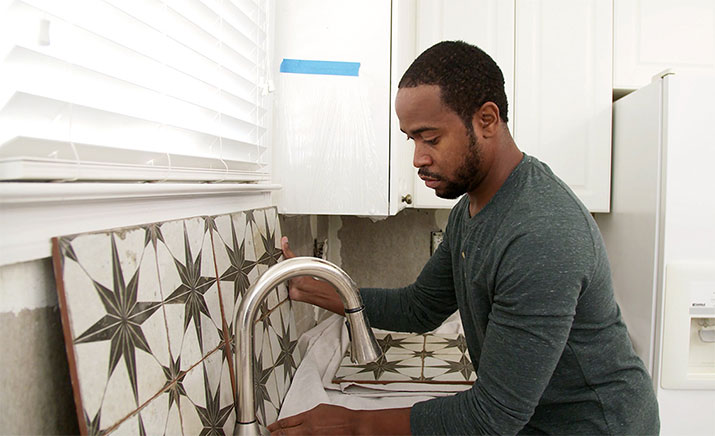
Step 2: Prepare the Wall

In order for the backsplash tiles to adhere well to the wall you should spend some time prepping the wall. If there is an existing tile backsplash that is being replaced, you should carefully remove the tile from the wall. Otherwise, be sure to remove any wallpaper or peeling paint that may make it difficult for the new tile to adhere to the wall. Check the wall for any holes or areas that may require a patch before moving onto the next step. Lastly, we always recommend finishing your prep by sanding the wall to create a smooth finish that makes it easier for the tile application.
Step 3: Install Backer Board (Optional)
Depending on the size and weight of your chosen tile, or the structural integrity of the wall, you may want to install a backer board behind the backsplash for added stability (and extra moisture resistance). This step is completely optional. Should you choose to, cut the backer board to the desired measurements and attach it to the wall with screws. Depending on the number of cuts you need to make in the backer board, you may need to fill any seams with mortar to leave you with a smooth surface.
Step 4: Plan Tile Layout
Before diving into the project, you should take the time to map out exactly how your tiles are going to be applied. Are you going to install traditional subway tiles in a horizontal pattern? Or are you using subway tile to create a bespoke chevron design? Whatever style or shape of backsplash tile you’ve selected, dry-fitting the tiles allows you to visualize the layout and adjust as needed so you can avoid running into problems like awkward cuts or corners once the tiles are adhered. We recommend using tile spacers throughout this step to maintain consistent spacing ? this is what makes a do-it-yourself tiling job look professional.
Step 5: Cut Backsplash Tile
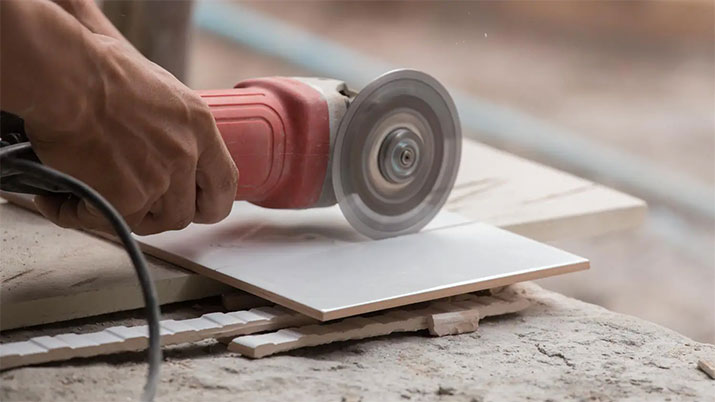
You may find that you need to cut a few of the tiles, especially at the ends or around the corner areas. Be mindful of your cuts. Precision is key so you don’t mess up and run through the extra tiles you purchased. Measure twice, cut once. It’s a golden rule in tile installation. For a professional cut, we recommend using a tile cutter or wet saw to ensure the cuts are straight and edges remain even. Use safety precautions when utilizing any tools to cut the tiles to the preferred shape.
Step 6: Prepare Mortar
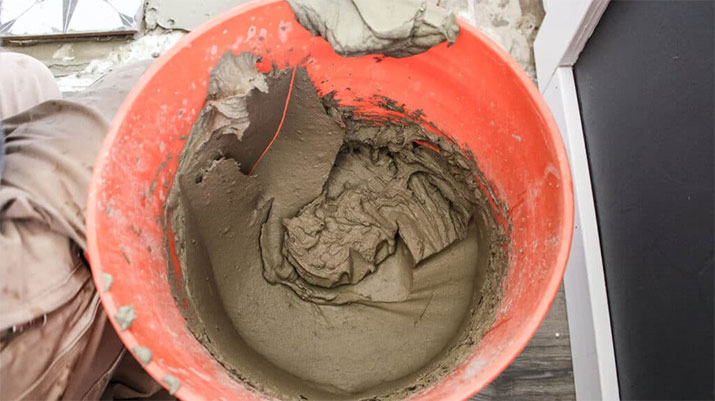
We promise we’re getting to the fun part of the project ? application ? soon! But before we can do that, we need to prepare the mortar. Mortar is a workable paste that hardens and is often used for tile, brick, stone, or similar materials that are being adhered to a wall. Pick up mortar from your local home improvement store and follow the package instructions to create it. The desired consistency will be similar to creamy peanut butter which will be easy enough to work with but thick enough to grip the backsplash tile. Once mixed, allow it to set for a few minutes before moving onto the next step.
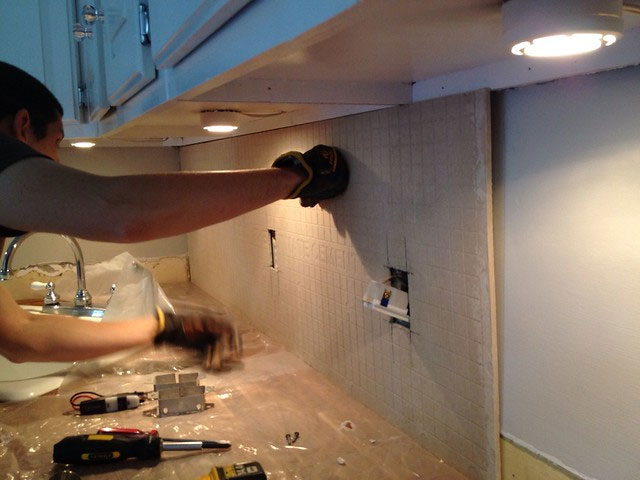
Step 7: Apply Mortar to the Wall
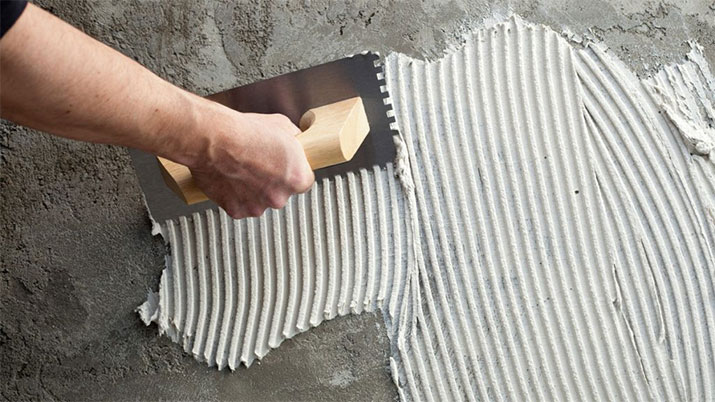
Once the mortar has set, it’s time to begin the installation process. Using a notched trowel, spread the mortar onto the area of the wall where the tiles are being applied. Keep in mind that you don’t want to apply the mortar to the entire wall at once. Instead, you should work in small sections to prevent the mortar from drying too quickly. To avoid applying the mortar outside of the area, start in the center and work your way outward to the edges.
Step 8: Lay Your Tiles

It’s finally the moment you’ve been waiting for! It’s time to apply your backsplash to the wall. Start in the center where you applied the mortar and begin at the bottom, creating the first row of tile. Although your countertop should be level, it doesn’t hurt to use a level when applying the first row of eco-friendly tile to ensure that the entire backsplash is level. The last thing you want is to get to the end, take a step back to admire your work, and notice that it’s applied at a slight angle. Once the first row in the center is applied, you can begin working your way up and out with the application.
Step 9: Apply Grout to the Backsplash
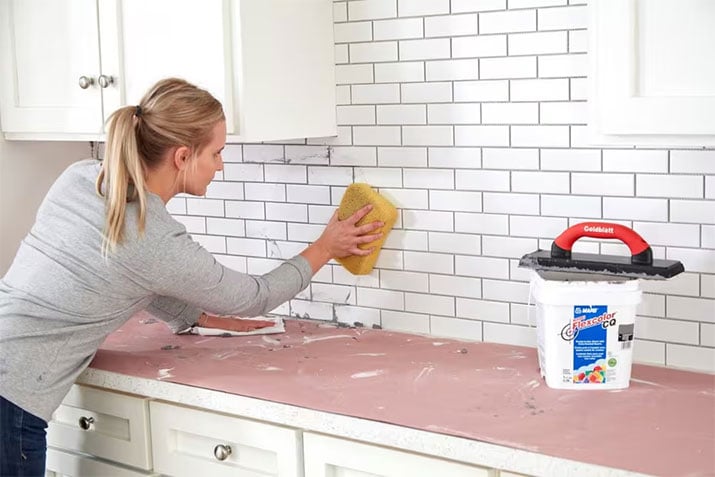
Opting for a pre-mixed and pre-sealed grout is a great choice for your DIY project, helping you kill two birds with one stone. Grouting, while a bit messy, doesn’t have to be daunting. Follow the instructions of your grout, mixing it until it reaches a toothpaste-like consistency. Use a rubber float to apply the grout into every nook and cranny of the joints. Maintain a 45-degree angle with your rubber float as you work, ensuring thorough coverage of all tile joints and grout lines. Following this technique will help you achieve a smooth and consistent finish for a professional-quality appearance. Remove any excess grout with a damp sponge. Once the grout has been applied, let the backsplash rest according to the manufacturer instructions.
Frequently Asked Questions
What type of tile is best for a kitchen backsplash?
There are a multitude of kitchen backsplash tile options that will work well in your space. Ultimately, it comes down to your style and overall preferences for the desired aesthetic. The most popular tile choices for kitchen backsplashes are ceramic, porcelain, glass, and natural stone.
What tools do I need for backsplash tile installation?
Backsplash tile installation is a moderately easy do-it-yourself project that even a novice DIYer can take on with the right tools in hand. For a professional-grade job, you will need a tile cutter or wet saw, trowel, rubber float, spacers, level, and a sponge for cleaning. We also recommend having safety gear on hand when cutting tiles to the desired shape and size.
Can I install backsplash tile over existing tile?
As we mentioned in our guide, it is recommended that you work with a smooth and clean surface for the best application. While most professionals would recommend that you remove the tile first, you can apply new tile over top of an existing backsplash if the existing tile is in good condition. If you plan to do this, it is recommended that you roughen up the existing tile with sandpaper to make it easier for the new tiles to adhere properly.
How long does it take to install a backsplash?
Depending on your knowledge and knowhow with do-it-yourself projects, installing a new kitchen backsplash can take anywhere from a weekend to a few days. It will vary depending on the size and difficulty of the installation job.
Andrew Saladino
Andrew Saladino is the Co-Founder of Kitchen Cabinet Kings and has helped more than 10,000 customers design kitchens that are both stylish and built to last. Recognized by the NKBA for his expertise in kitchen design, he believes the secret to a successful remodel comes down to planning, patience—and plenty of caffeine.
![See your dream kitchen in 3D [GET YOUR FREE DESIGN]](https://cdn.kitchencabinetkings.com/blog/wp-content/uploads/see-your-dream-kitchen-in-3d.webp)
![Contractor Discount Program: Offering contractors and builders special volume discounts on all applicable orders [LEARN MORE]](https://cdn.kitchencabinetkings.com/blog/wp-content/uploads/contractor-discount-program.webp)
![Explore our photo gallery [GET INSPIRED]](https://cdn.kitchencabinetkings.com/blog/wp-content/uploads/explore-our-photo-gallery.webp)
![What everyone is saying about KCK [READ REVIEWS]](https://cdn.kitchencabinetkings.com/blog/wp-content/uploads/what-everyone-is-saying-about-kck.webp)
![Get a cabinet sample [SHOP SAMPLES]](https://cdn.kitchencabinetkings.com/blog/wp-content/uploads/get-a-cabinet-sample.webp)
![Pay over time, on your terms with Affirm [LEARN MORE]](https://cdn.kitchencabinetkings.com/blog/wp-content/uploads/pay-over-time-on-your-terms-with-affirm.webp)


