Bathroom
How to Clean Grout: 6 Tips for a Good-As-New Look
by Andrew Saladino
March 28, 2023
It’s not uncommon for grout to be the last thing you think about when cleaning your bathroom — but it shouldn’t be. While it doesn’t make the largest impact on the overall aesthetic of your home, it plays an important role in filling the gaps between tiles in your bathroom walls, and other surfaces. However, it is a porous material, meaning it is one of the first places that accumulates dirt, mold, mildew, and other bacteria.
Because of this, you must clean your bathroom grout properly to avoid unsightly discoloration and staining. While it may not be your favorite task on your to-do list, cleaning your grout doesn’t have to be time-consuming. Follow along as grout good-as-new.

Restoring the Appearance of Your Grout
Ready to make your primary bathroom feel as shiny and new as a 5-star hotel? Here are recommended steps for improving the appearance of your grout:
Decide on a Cleaning Solution
We know you’re anxious to start, but before cleaning the entire bathroom, we recommend first using the cleaning solution on a small area. If you dive right in, there is a chance that the selected cleaning solution damages or discolors your grout (which is the last thing you want!). Once you’ve taken the time to test your cleaning solution in an inconspicuous area and are satisfied with the results, you can kickstart the project.
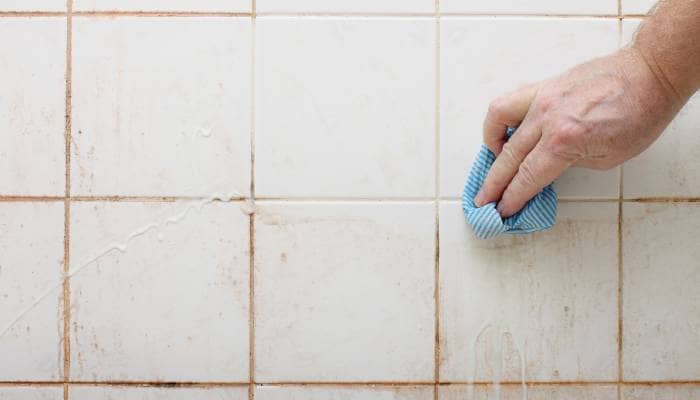
Soak and Scrub the Grout
After selecting your grout cleaner, apply it to your bathroom’s grout and use a scrubbing brush to help remove any buildup along the grout lines. Remember that if you are cleaning a bathroom that hasn’t been cleaned in a while, you may want to leave the mixture on the grout for 10 to 15 minutes before scrubbing. This will allow the cleaning solution to fully penetrate the stains and grime before you get to work — making your job a little easier.
Rinse and Dry the Area
After scrubbing the grout lines, it’s time to rinse off the cleaning solution with clean water. Although your bathroom is used to water and can handle being wet, you should also dry the freshly cleaned area to seal the grout.
Seal the Grout, If Desired
Although an optional step in the process, sealing the grout is a helpful way to reduce the chance of long-term damage to your grout lines over time, you will still need to clean them regularly, but the sealer will help minimize water staining and discoloration. Using these steps, you can restore your grout to look good-as-new during your spring cleaning.
6 Effective Grout Cleaning Methods
Now comes the trickier part — determining what type of cleaning solution works best for your bathroom’s grout.
Grout Cleaner
One of the easiest ways to clean grout is to use a commercial grout cleaner you can pick up from the grocery store on your weekly visit. A store-bought grout cleaner tends to be stronger than any homemade cleaning solution, making it the perfect fighter against any buildup on your grout lines. Depending on your preference, you may decide on a spray, gel, or foam cleaner — or from trial and error, you may find that one type works better than another for your specific type of grout. Either way, commercial grout cleaners are often filled with harsh chemicals to clear away grime effectively, so we recommend opening your bathroom windows to keep the area well-ventilated.
Lemon Juice & Baking Soda

We don’t know about you, but we love the smell of lemon-scented cleaning products, especially homemade ones! If you are cleaning your children’s bathroom, you’re probably searching for a non-toxic and eco-friendly cleaning solution that won’t leave any harmful residue behind. Another cleaning solution that can be concocted at home is a combination of lemon juice and baking soda. This natural acid mixed with baking soda gets into the deepest parts of the grout stains to restore it to its natural beauty. For best results, you’ll want to follow a similar process to the other cleaning solutions, allowing the natural cleaning solution to sit on the grout and penetrate the dirt for a few minutes before washing it away.
Baking Soda & Vinegar
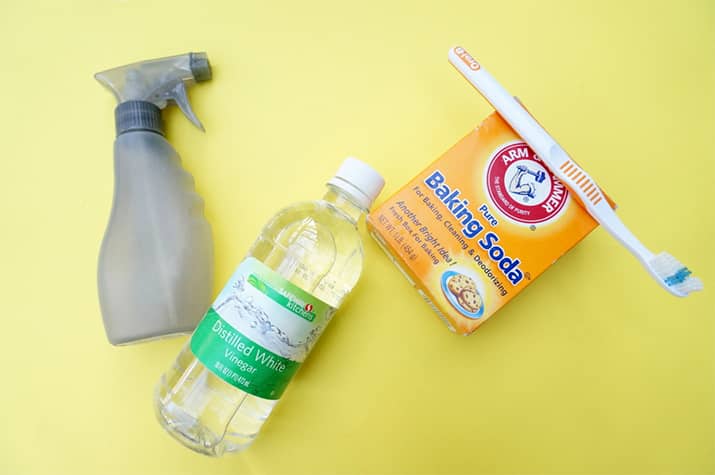
We love when a cleaning solution is as simple as combining household products you likely already have under your sink. Open your pantry and grab some baking soda and vinegar to create the perfect naturally abrasive and disinfecting cleaning solution. Combining these two household products in equal parts to create a thick paste will give you a tried-and-true cleaning mixture that will eat away at the muck and dirt on your grout. For best results, we recommend allowing the paste to sit on the grout for a few minutes before scrubbing it away.
Hydrogen Peroxide & Baking Soda
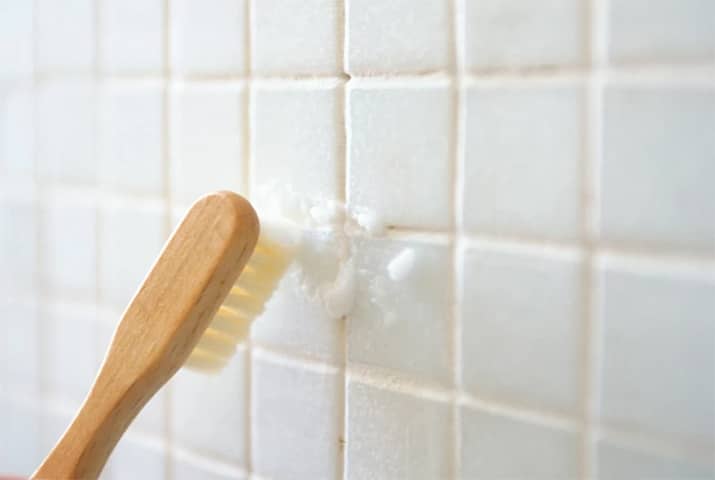
Don’t have vinegar in your kitchen? We have an alternative for you. Head to your first aid kit and grab your hydrogen peroxide. Like the homemade cleaning solution, you can create a similar paste by combining equal parts hydrogen peroxide and baking soda. Using a brush, create a thick paste by combining the two ingredients and paint it onto your grout lines. Allow the mixture to sit on the grout for a bit before scrubbing the grout clean. Have peace of mind knowing that this homemade cleaning solution will do an excellent job breaking down the buildup forming on your grout lines between cleans.
Steam Cleaner

Do you have a steam cleaner lying around in a closet somewhere? Luckily, your steam cleaner does more than keep your dress shirts looking wrinkle-free. Instead, you can use your steam cleaner to help lift out stains and dirt from the grime by holding the steam cleaner directly over the grout. You may need to follow up with some cleaning solution, but the steam cleaner is one of the most effective cleaning solutions for severely dirty grout lines that may not have been cleaned in quite some time.
Frequently Asked Questions
What is the best grout for bathroom tiles?
If you’re in the market for grout for an upcoming bathroom remodel or renovation, we recommend using epoxy grout. This is one of our favorite grout types because of its durability and water resistance — making it an ideal option for grout in a wet area like your bathroom! Plus, you can choose from various grout colors, an easy way to go longer between cleanings (if you stay away from stark white grout).
Does vinegar damage tile grout?
The last thing you want to do when cleaning your bathroom’s grout is to cause irreversible damage. We always recommend trialing a cleaning solution on a small area before diving headfirst into the project. Vinegar is a naturally acidic liquid that can corrode certain types of tile and grout when misused. If vinegar is the most effective at cleaning your grout, try diluting it with water to avoid causing damage while still getting an effective clean.
How can I get my grout white again?
How old is the grout in your bathroom? When was the last time it was thoroughly cleaned? While each cleaning solution mentioned above will effectively clean your grout, numerous factors will impact how (and if) your grout will return to white again. Try repeating the process with a few different cleaning solutions to see which is the most effective for the grout in your home.
Can you put new grout over old grout?
If, after cleaning your grout, you notice that there is actual damage and not just dirt, you may need to replace the grout in your bathroom. You may wonder if you can apply the new grout over the top of the existing grout (and possibly only in the affected area). However, applying grout over an existing layer of grout is not recommended as it will have difficulty adhering to cracked or crumbling areas. For best results, you will want to start fresh.
Andrew Saladino
Andrew Saladino is the Co-Founder of Kitchen Cabinet Kings and has helped more than 10,000 customers design kitchens that are both stylish and built to last. Recognized by the NKBA for his expertise in kitchen design, he believes the secret to a successful remodel comes down to planning, patience—and plenty of caffeine.
![See your dream kitchen in 3D [GET YOUR FREE DESIGN]](https://cdn.kitchencabinetkings.com/blog/wp-content/uploads/see-your-dream-kitchen-in-3d.webp)
![Contractor Discount Program: Offering contractors and builders special volume discounts on all applicable orders [LEARN MORE]](https://cdn.kitchencabinetkings.com/blog/wp-content/uploads/contractor-discount-program.webp)
![Explore our photo gallery [GET INSPIRED]](https://cdn.kitchencabinetkings.com/blog/wp-content/uploads/explore-our-photo-gallery.webp)
![What everyone is saying about KCK [READ REVIEWS]](https://cdn.kitchencabinetkings.com/blog/wp-content/uploads/what-everyone-is-saying-about-kck.webp)
![Get a cabinet sample [SHOP SAMPLES]](https://cdn.kitchencabinetkings.com/blog/wp-content/uploads/get-a-cabinet-sample.webp)
![Pay over time, on your terms with Affirm [LEARN MORE]](https://cdn.kitchencabinetkings.com/blog/wp-content/uploads/pay-over-time-on-your-terms-with-affirm.webp)


