The Complete Kitchen Spring Cleaning Checklist
By: Andrew Saladino |  8 min
8 min
With spring comes renewal and an opportunity to refresh -- and that often includes a top-to-bottom deep clean. But there's one room in particular that deserves a good spring cleaning: your kitchen. According to Dr. Charles Gerba, a microbiologist at the University of Arizona, in most cases, it's safer to make a salad on a toilet seat than it is on a cutting board.
If you're looking to get your kitchen sparkling clean this season, follow our kitchen spring cleaning checklist to make sure you're hitting all the areas that could use a deep clean!
Printable Kitchen Cleaning Checklist
It’s easy for some areas of your kitchen to go unnoticed (or ignored), and Spring cleaning is the time to give these areas the attention they deserve. As you work through your kitchen, use this kitchen cleaning checklist as a step-by-step guide to help you tackle every nook and cranny — from the top of your cabinets to the floorboards.


Fridge and Freezer
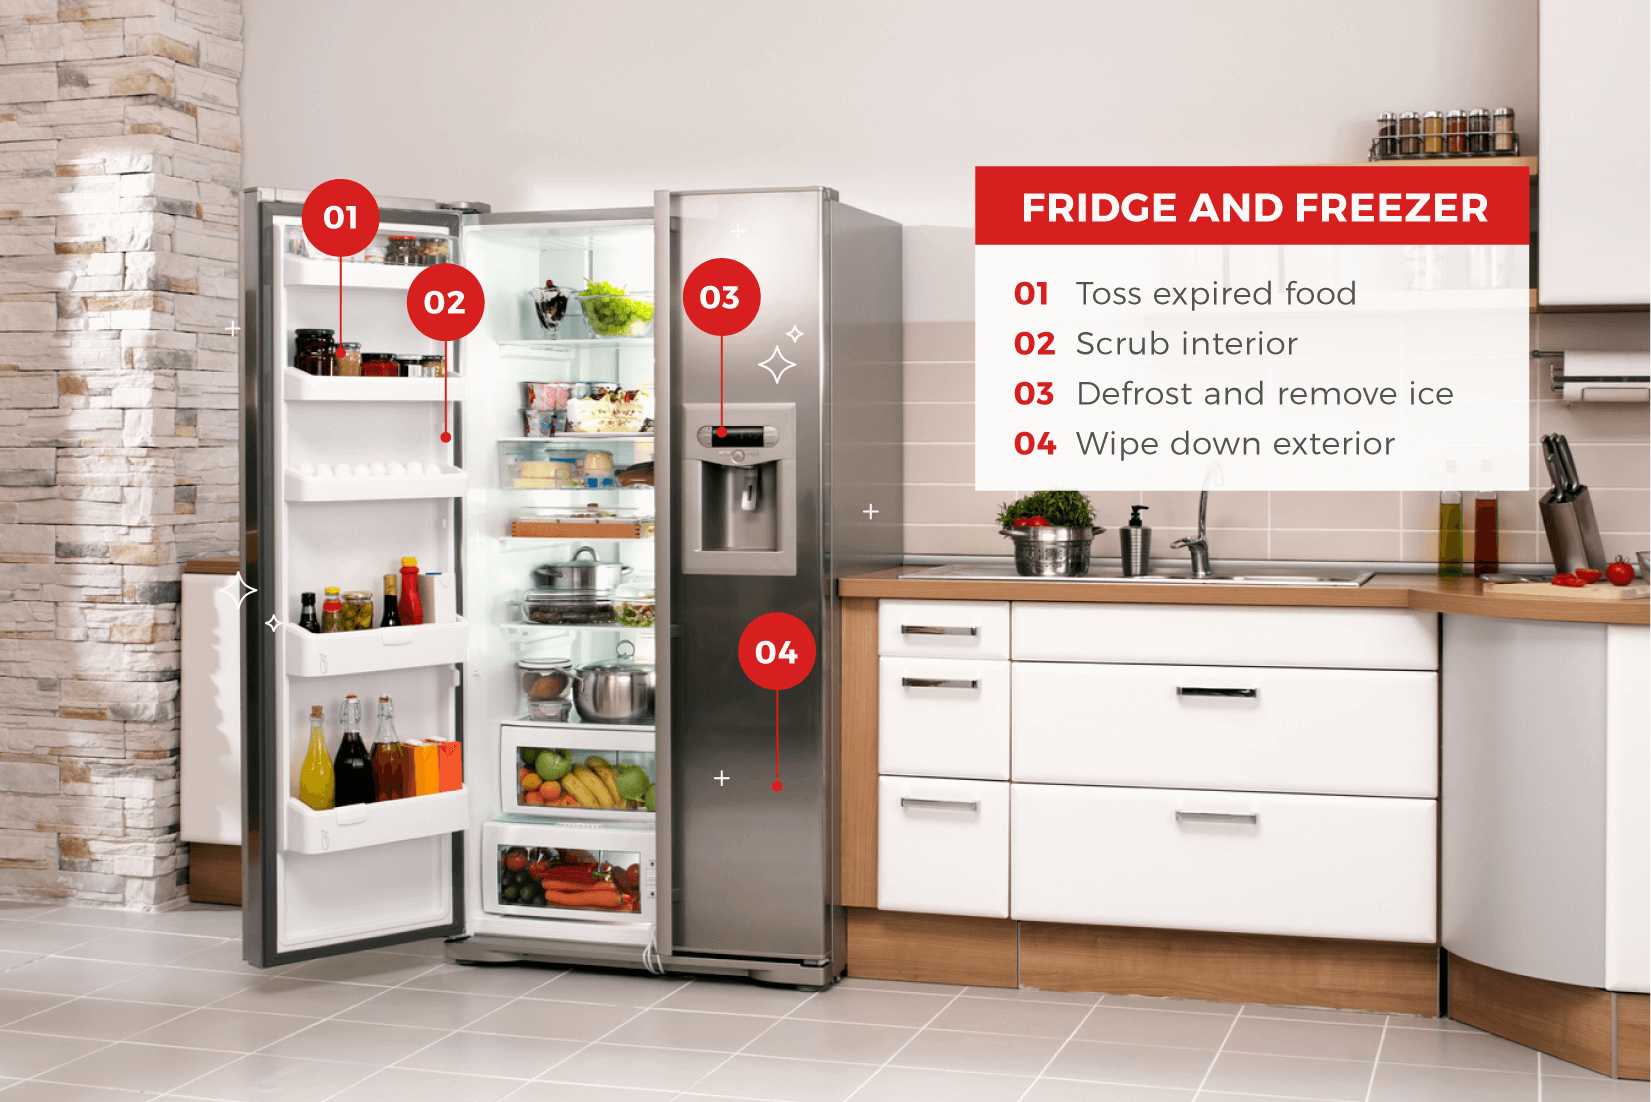
Your refrigerator is the most-used appliance in your kitchen. Keeping it sanitized should be a priority, not just to prevent mold and unpleasant odors but to keep it working correctly. Cleaning your fridge is also a great opportunity to throw out expired food and condiments (yes, condiments have an expiration date!).
You should ideally deep clean your fridge at least twice a year, so mark this on both your spring and fall cleaning lists. Defrost your freezers every couple of months to prevent ice buildup.
Supplies needed:
- Microfiber cloths
- Distilled white vinegar (do not use cleaners that may release harmful odors)
- Warm water
- Dish soap
- Spray bottle
- Plastic ice scraper (do not use blade or steel tools)
- Vacuum with a crevice tool (or an old toothbrush)
- Butter knife
How to clean your fridge and freezer:
- Empty the fridge and freezer completely, and toss expired or spoiled food. Wipe the undersides of sticky bottles and jars and place non-expired food in a cooler or thermal bag until you finish cleaning.
Optional: Unplug your refrigerator and let the inside come to room temperature. This will prevent plastic shelves from cracking when removing them from the fridge. Leave the freezer door open to allow ice to melt.
- Disassemble fridge shelves and doors and transfer to the sink. Carefully wash all removable parts in warm soapy water.
- With the fridge completely empty, wipe the interior surfaces with a solution that's equal parts warm water and vinegar.
- Pour a small amount of the vinegar/water solution into the drain hole.

- Using either the vacuum or a cleaning toothbrush, clean between the crevices in the door seal to remove crumbs.
- Wrap the butter knife in a soft cloth, dip in the vinegar/water solution, and run it along the crevices to remove even more grime. Go over it once more with a dry cloth.
- Dry and reassemble the fridge shelves and drawers.
- Defrost the freezer by removing as much ice as possible with a plastic ice scraper.
- Spray the interior of the freezer generously with equal parts warm water and vinegar and wipe it down.
- Dry the inside of the freezer.
- Place food back into the freezer and fridge once the temperature of the freezer is below 32 degrees Fahrenheit.
- Wipe down the exterior of your fridge and freezer with warm water soapy water or a mild detergent and a soft cloth.
Optional: If cleaning stainless steel appliances, follow up with a stainless steel polish or rub in a bit of olive oil to restore shine.
Oven
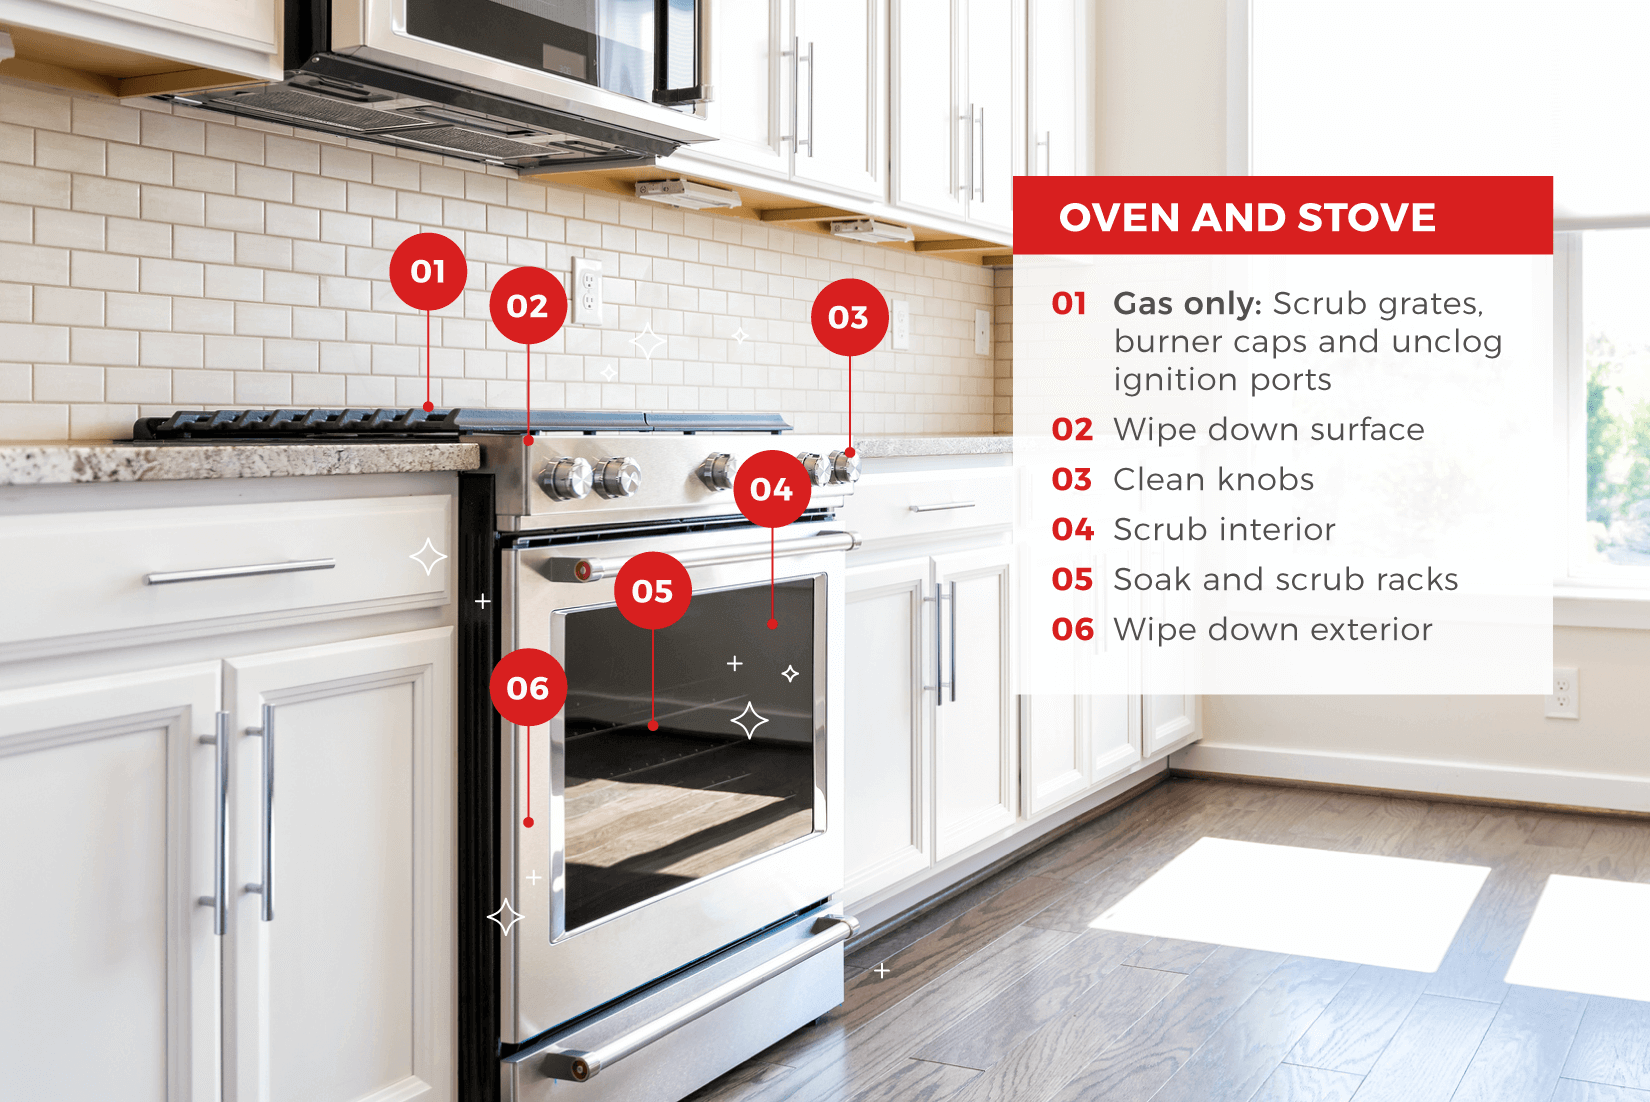
Your stovetop and oven are the powerhouses of the kitchen, but with heavy use comes grime buildup. Regularly cleaning your oven and stove to help them work more efficiently and — more importantly — prevent food debris and oil from burning and catching fire.
Most newer oven models have a self-cleaning feature that uses extremely high heat to incinerate baked-on residue and grease. However, if your oven doesn’t come with this feature, or you’d rather not have the smoke and smell, then a little baking soda and some elbow grease can remove a year’s worth of grime.
Supplies needed:
- Gloves
- Baking soda
- Dishwasher detergent
- Distilled white vinegar
- Plastic scraper
- Dishcloth or sponge
- Spray bottle
- Old towels or rags
- Toothbrush
How to clean your oven and stovetop:
- Remove everything from the oven and stove, including knobs, grates, burner caps, racks, pizza stones, thermometers, etc.
- Line your bathtub with old towels so the oven racks won't scratch the enamel.
- Lay down the oven racks, burner caps, and knobs.
- Fill the bath with very hot water until the racks and burners are covered.

- Add a one-half cup of dishwasher detergent to the bath and swish it around. Let the racks and burners soak for at least 4 hours, or overnight, if possible.
- Create a paste using a half cup of baking soda and a few tablespoons of water. Adjust the ratio until you have a spreadable consistency.
- Pull on your gloves and spread the paste over the interior of the stove, avoiding the heating elements. Pay extra attention to particularly greasy areas, like the bottom of the stove.
- Allow the paste to rest for at least 12 hours (or overnight).
- Wipe out the oven with a damp cloth or sponge. Use the scraper to remove extra paste in hard-to-reach places.
- Place vinegar in a spray bottle and spray down the interior of your oven. The leftover paste will begin to foam.
- Wipe out the oven with a damp cloth until all the baking soda residue is gone and your oven is left sparkling clean. Use the vinegar spray as needed.
- Collect your oven racks and knobs. Scrub off any remaining gunk with a sponge. Rinse, dry, and replace the racks.
- Wipe down the exterior of the oven with warm water and soap or a mild cleaner. Replace the knobs.
Once you've finished cleaning your oven, you can turn your attention to the stove. Make sure all grates, burner caps, and knobs have been removed. If you're cleaning an electric stove, just remove the knobs.
The next few steps will depend on your type of stove. Gas, electric coil, and glass-top stoves all have elements that require a specific cleaning regimen. This guide includes instructions for cleaning each type of stove.
Kitchen Drawers

Kitchen drawers may be closed most of the time, but they are somehow notorious for collecting stray crumbs, mystery stains, and clutter. Cleaning out your kitchen drawers as part of your spring cleaning checklist can help keep your kitchen organized and tidy.
Supplies needed:
- Dish soap
- Baking soda
- Sponge
- Toothbrush
- Cotton swab
- Screwdriver
How to clean your drawers:
- Remove everything from your drawers (It may be easier to do this one at a time if your kitchen lacks counter space)
- If possible, carefully remove the drawers from the runners.
- Dump out loose debris in a trash can and wipe the entire surface (inside, outside, the sides, runners, and hardware) with warm, soapy water. Use a toothbrush or cotton swab in tight corners and edges.
Optional: For substantial grease buildup, create a baking soda paste and scrub away the stains with an old toothbrush or sponge. - Dry the drawers completely and replace them back into the runners.
- If necessary, remove the hardware from the drawers with a cross-head or flathead screwdriver, depending on the screw. Let it soak in warm, soapy water for 10-15 minutes to remove the grime. Scrub away any excess gunk and screw back onto the drawer.
- Leave the drawers open to dry for 10-20 minutes.
- Replace the contents of the drawers, taking time to sift through what does and doesn't belong.
Kitchen Cabinets

Are your kitchen cabinets looking a little dull? Maybe there are a few spills hidden underneath pasta boxes and cookbooks? Cleaning your cabinets inside and out can help sanitize and brighten your kitchen. Focus on cupboards that get used the most, like the pantry and spice cabinet. Those placed above and below your stove and sink also tend to collect the most gunk.
Supplies needed:
- Baking soda
- Vegetable oil
- Vinegar
- Dish soap
- Spray bottle
- Sponge
- Toothbrush
- Soft cloth or rag
- Optional: screwdriver
How to clean your cabinets:
- Remove all items from your cabinets. Toss anything that is expired or nearly empty. Wipe down dirty containers.

- Fill a spray bottle with soapy water and spray down the inside of the cabinet. Do not soak the cabinets in the solution because it could warp the wood. Wipe down the shelves and sides of the cabinet with a sponge or damp cloth.
- Gently scrub away any leftover residue with a 1:2 part baking soda and vegetable oil solution for natural wood cabinets. For painted cabinets, use 1:1 part vinegar and water solution.
- Wipe down the exterior of the cabinets with soapy water and a damp cloth. Use a bit of pressure to lift stubborn grime.
- Scrub around the hardware with a toothbrush and baking soda paste. If the hardware is especially gunky, use a screwdriver to remove it and let soak in warm, soapy water for 10-15 minutes. Scrub away excess dirt and screw back into the cabinets once clean.
- Wipe down the interior and exterior of the cabinets one last time with a damp cloth to remove any leftover cleaner or dust.
- Leave the cabinets open and allow 10-20 minutes to dry. This will prevent any mold or rust from growing in damp spots.
- Replace items back into your cabinets. As you do this, wipe off any jars or dishes with a damp cloth to ensure they don't have residue that will dirty your cabinets.

Kitchen Countertops
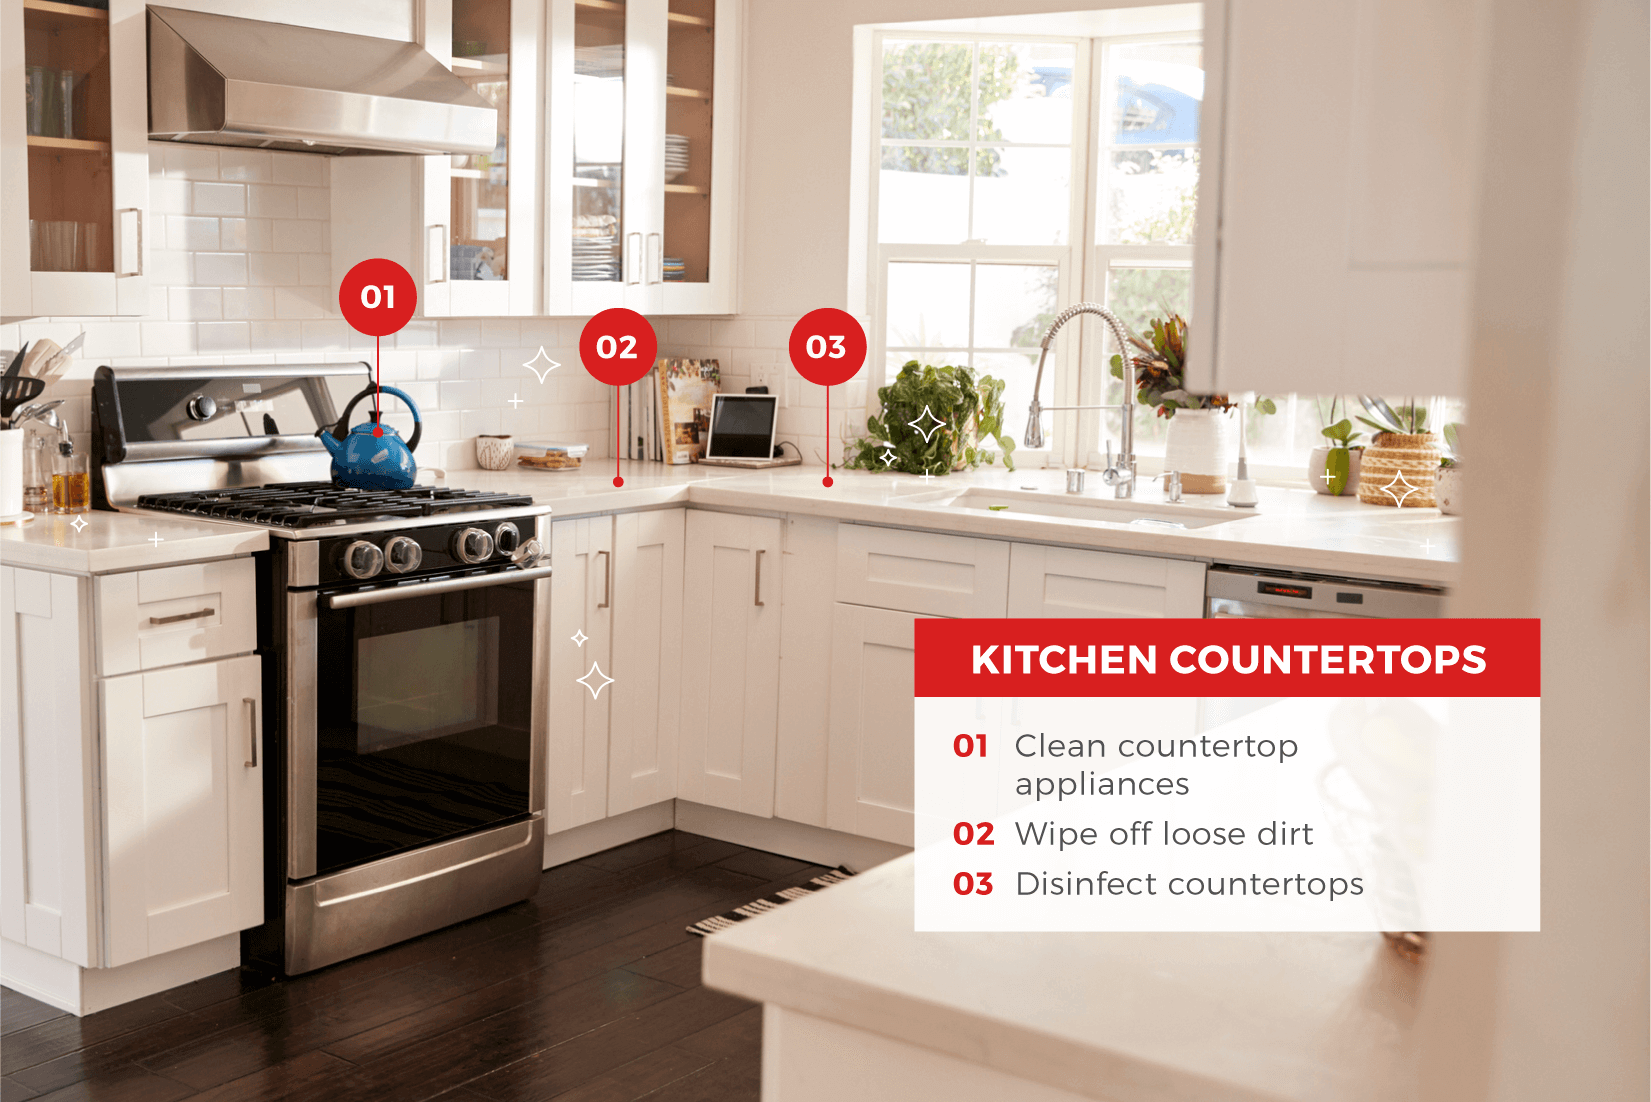
Even if you wipe down your counters regularly, it’s likely there’s still a good amount of bacteria living on them. Use this opportunity to deep clean your countertops not only to disinfect but to protect and restore shine.
Supplies needed:
- For granite, soapstone, and wood: Bleach
- For laminate marble, and stainless steel: Disinfectant spray
- For engineered stone and quartz: Rubbing alcohol
- Water
- Gloves
- Soft cloths
How to clean your countertops:
- Move everything off the countertop so it is completely bare.
- Remove any loose dirt from your countertops with a dry cloth.
- Wipe down cabinets with a cleaner suitable for your type of countertop.
- Use warm soapy water for wood, marble, granite, and stainless steel
- Use a mild, multi-purpose cleaner for laminate and soapstone (spot test first!).
- Disinfect countertops with a solution suitable for your type of countertop.
- For granite, soapstone, and wood countertops, dilute bleach with warm water according to the directions on the bleach. Wipe down countertops with the solution and rinse with warm water and a fresh cloth.
- For laminate, marble, and stainless steel countertops, use a disinfecting spray formulated for those materials as bleach may discolor the counters. Rinse with warm water and a fresh cloth.
- For engineered stone and quartz, wipe down the countertops with a 1-to-4 parts alcohol and water solution. Rinse with warm water and a fresh cloth.
Sink and Dishwasher
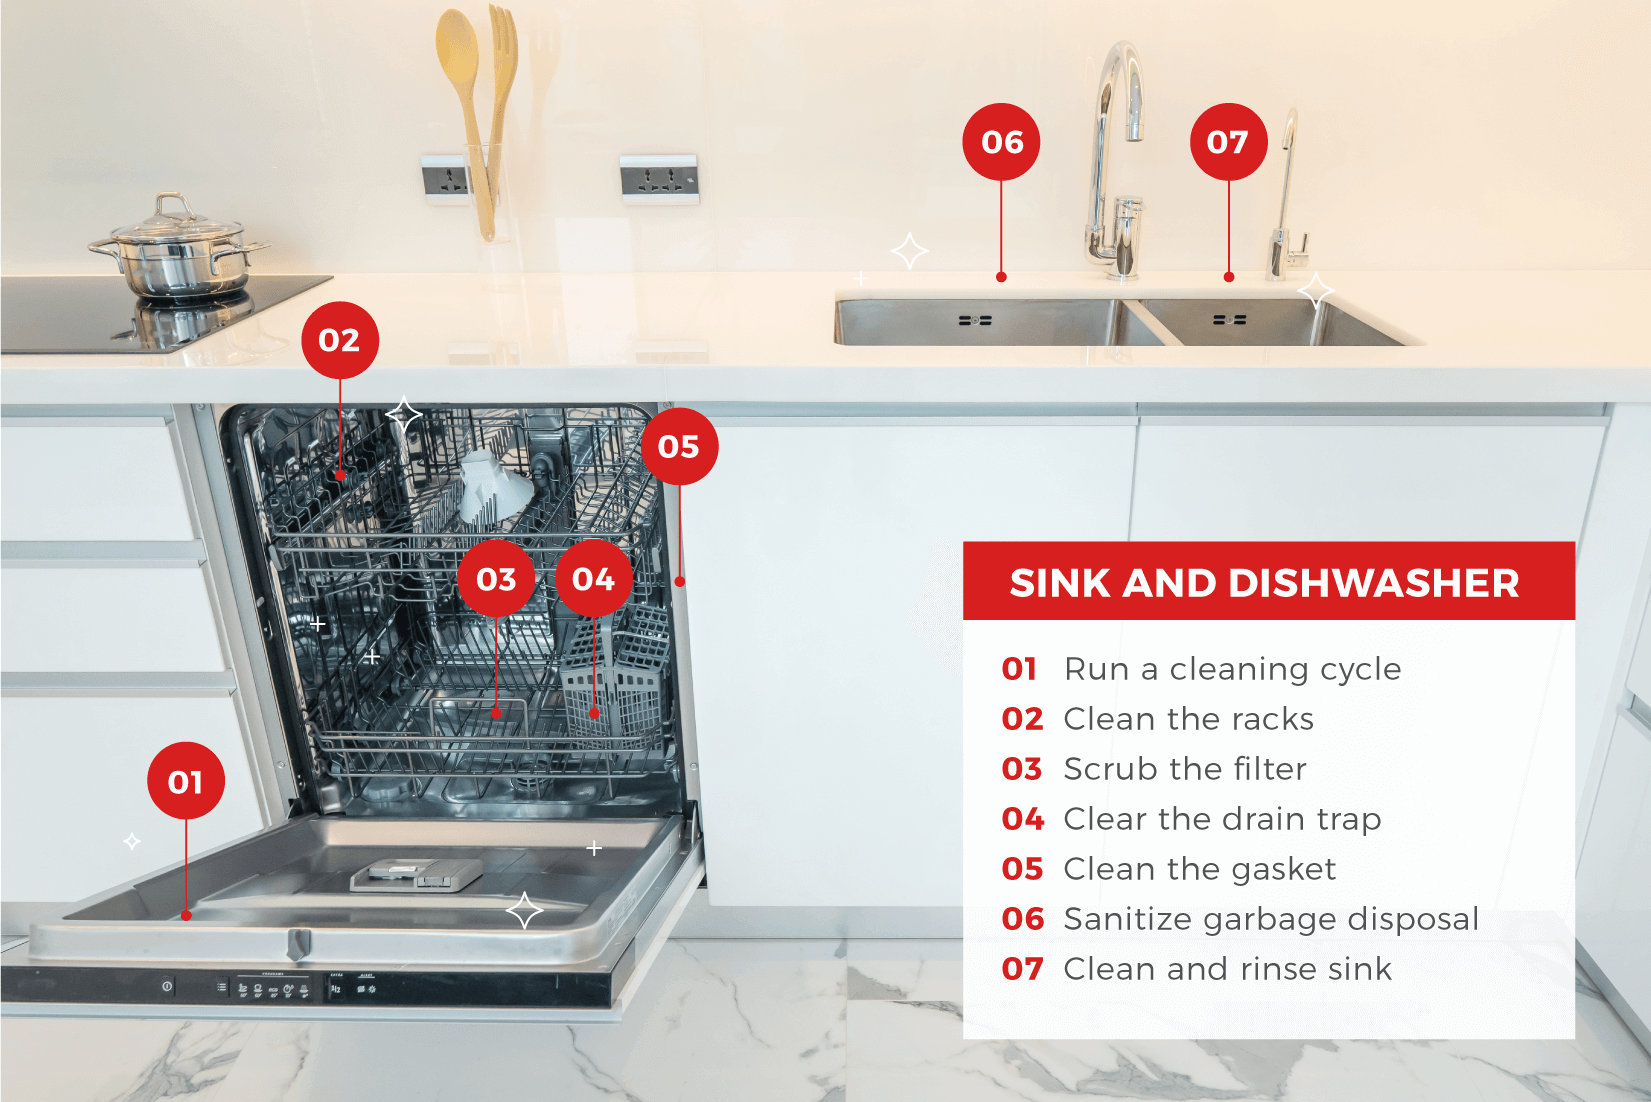
It seems counterintuitive that the appliances you use to clean are often the dirtiest. Between stagnant water, food residue, and whatever germs your handwashing transfers, your kitchen sink and dishwasher can become a breeding ground for mold and mildew. Follow these steps to disinfect your sink and dishwasher to keep bacteria at bay.
Supplies needed:
- Baking soda
- Dish soap
- Distilled white vinegar
- Lemon peel
- Sponge or cloth
- Paper towels
- Toothbrush
How to clean your sink and dishwasher:
- Empty your kitchen sink and rinse it out to make sure there aren't any stray food bits.
- Sprinkle baking soda around the entire sink and scrub with a sponge or cleaning cloth
- Soak the paper towels in vinegar and lay them over the sides of the sink. Let them sit for at least 20 minutes.
- Sanitize the disposal by pouring one cup of baking soda, then one cup of vinegar into it.
- Once the mixture stops fizzing, drop the lemon peel down the disposal and run the water and disposal until you clear everything out.
- Remove the paper towels and rinse your sink clean.
- Empty your dishwasher completely. Remove the racks and set them aside.
- Clean the gasket (door seal) with an old toothbrush to remove grime from the crevices. Wipe clean with a damp cloth.
- Remove the filter (check your owner's manual for instructions) and rinse under hot water.
- Scrub the mesh screen and frame with a toothbrush to remove food particles and grime. Rinse it clean.
- Lock the filter back in the dishwasher. Clear the drain trap of any food particles using a soft cloth.
- Scrub the racks with warm, soapy water. Place back into the dishwasher.
- Disinfect the dishwasher by placing a bowl filled with one cup of vinegar on the top rack and run a hot cycle with no detergent or dishes.
Optional: After the vinegar cycle, sprinkle baking soda in the bottom of the dishwasher and run another hot cycle for extra freshening. - Wipe away any residue or build-up from the inside and outside of the door, its edges, the door handle, and controls with a damp cloth.
Note: Avoid abrasive cleaners or pads that could scratch your dishwasher.
Windows
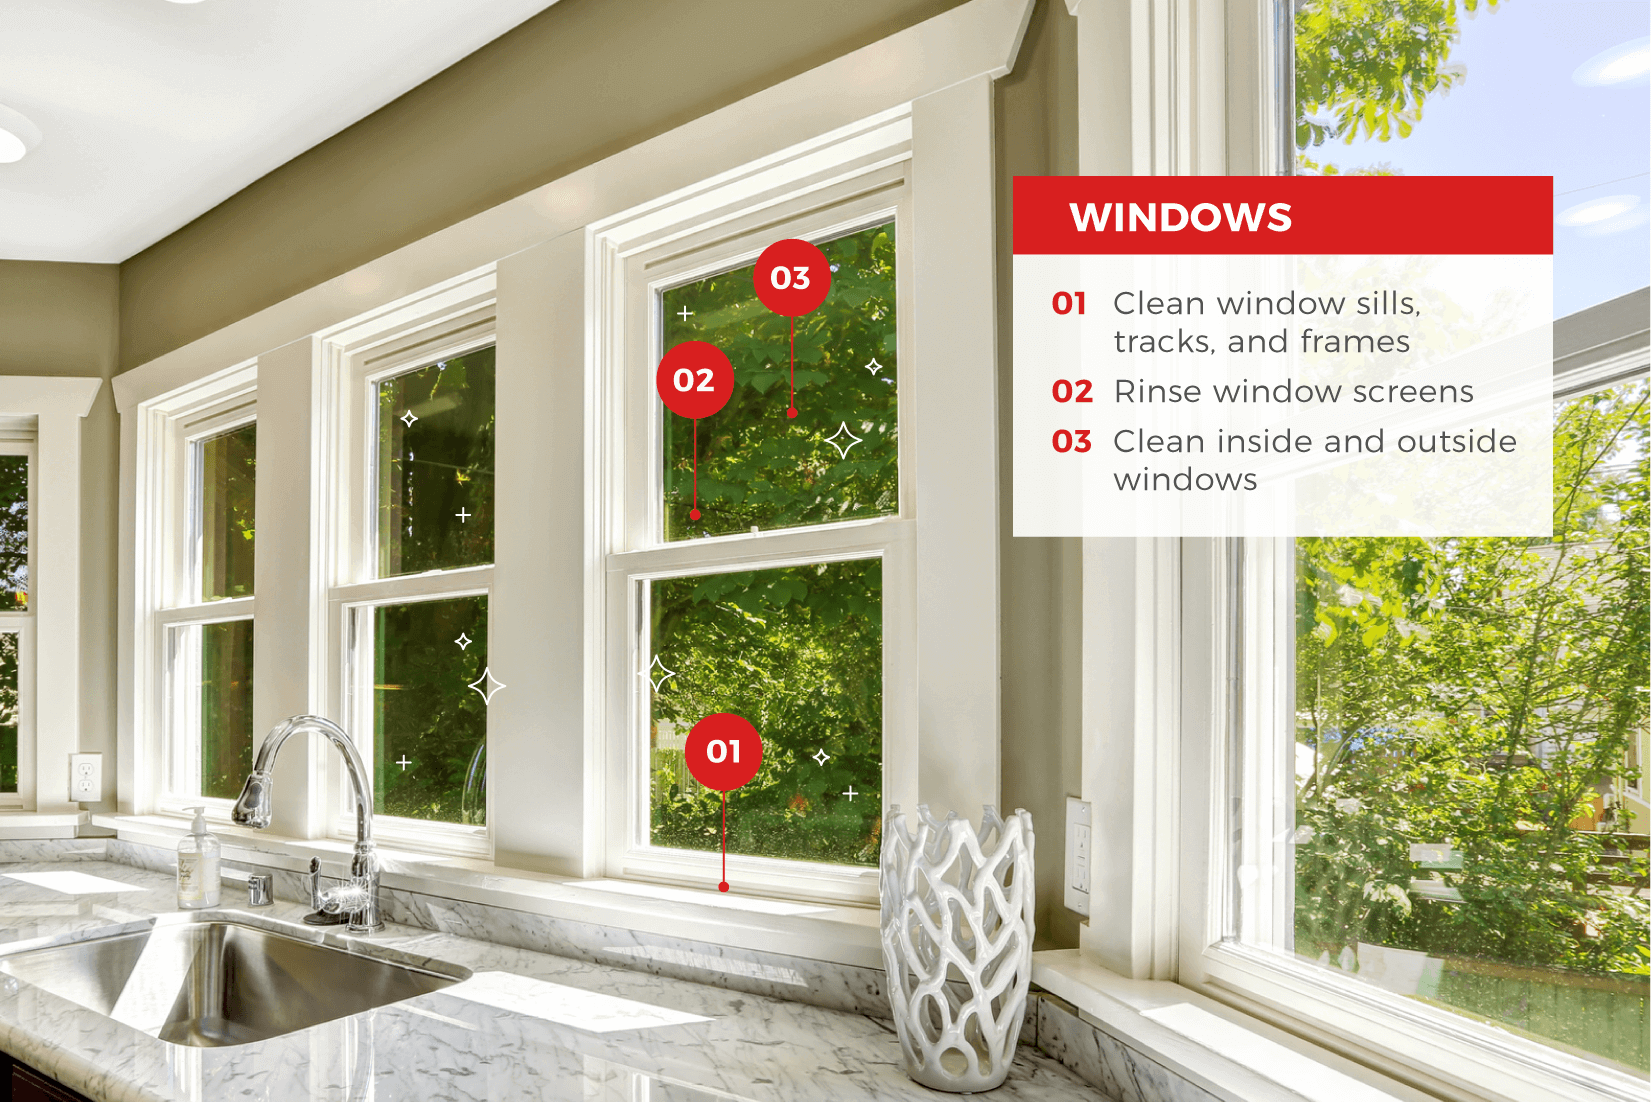
After a few months of rain or snow, it’s likely your windows need a refresh. With the sunny days comes dirt, dust, and water spots that are hard to ignore. Follow these spring cleaning steps for an easy streak-free shine.
Supplies needed:
- Vinegar
- Dish soap
- Spray bottle
- Lint-free towel or paper towels.
- Hose (for outside windows)
- Squeegee (optional)
How to clean your windows:
- Clear off your windowsills.
- Remove the window screens and gently rinse them with a hose. If necessary, wipe up excess dirt with a soft cloth and soapy water. Set aside to dry.
- Wipe down your windowsills with warm, soapy water. If necessary, vacuum the sills and tracks beforehand to remove loose dirt.
- Wipe the side of the windows, frames, and tracks with soapy water.
- Combine one part vinegar with two parts water in a spray bottle.
- Spray the solution all over the interior of your windows and wipe away in a z-shaped motion with your towel. Repeat if necessary.
- Repeat steps 2-5 for the exterior of your windows.
Note: If your exterior windows are especially dirty, spray with a hose and squeegee away excess water prior to using the vinegar solution. - Carefully replace window screens.
Kitchen Floor
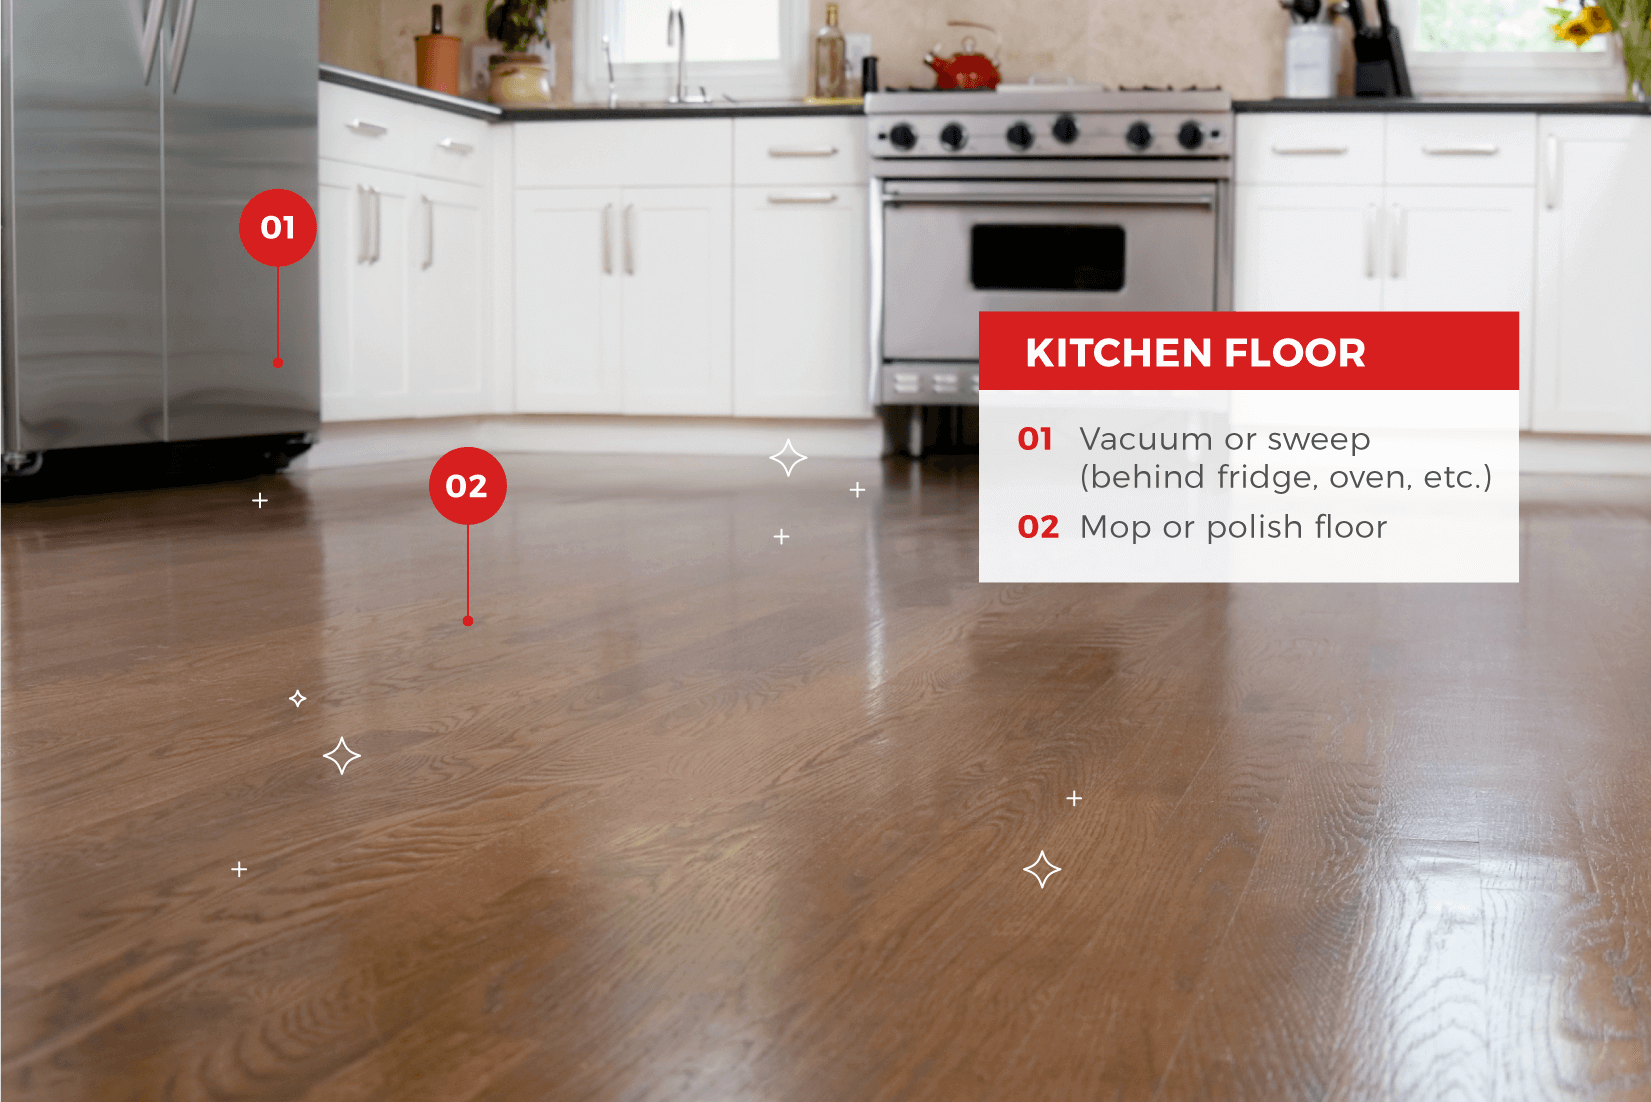
Between heavy foot traffic and unexpected spills, your kitchen floors have seen their fair share of messes. To keep them looking their best, it’s important to clean your kitchen floors regularly. But as part of your spring cleaning checklist, pay special attention to the areas we often miss, such as below your cabinets and behind your fridge and stove!
Supplies needed:
- Vacuum
- For vinyl and tile: Dish soap, rubber bristle brush, mop, and bucket
- For wood laminate: Vinegar, soft cloth, and bucket
- For hardwood: Microfiber mop and Hardwood floor cleaner
How to clean your floor:
- Remove barstools, small tables, etc from the kitchen.
- Vacuum loose dirt and dust from the floor. Use the vacuum hose and attachments to vacuum behind appliances (you may need to ask for help moving them).
Note: if you don't have a vacuum, it's ok to use a broom.
The next few steps will depend on your type of flooring.
For vinyl and tile floors:
- Combine a few drops of dish soap and warm water in a bucket.
- Mop the floor starting from the inside of the kitchen out so you don't corner yourself.
- Scrub stubborn spots with a rubber bristled brush
- Allow the floor to dry completely before moving items back into the kitchen.
For wood laminate floors:
- Mix one cup of vinegar per one gallon of water in a bucket.
- Saturate a soft cloth with the solution and wring out any excess water. You want to avoid soaking the floors.
- Wipe the entire floor with the cloth using circular motions. Rinse the cloth in the solution or in the sink as needed and wring out excess moisture. If your floors are very dirty, you may need to change the solution once or twice.
- Allow the floor to dry completely.
For hardwood floors:
- Follow the directions on the hardwood cleaner. Never pour liquid directly onto hardwood floors!
- Mop the floor using the microfiber mop and cleaner.
How to Keep Your Kitchen Clean
After all your hard work, it’s understandable you’d want to keep your kitchen nice and tidy for as long as possible. While it’s inevitable that messes will happen, here are a few easy tips to help keep your kitchen clean year-round.
Tips to keep your kitchen clean:
- Wipe and disinfect your countertops weekly. Some countertops also need to be sealed periodically to avoid stains.
- Wipe up spills on your stovetop or in your oven as they happen. This will slow down grime from building up and prevent kitchen fires!
- Waiting for water to boil? Use your time wisely and clean during your cooking downtime.
- Place dry goods in resealable containers to avoid spills in the cabinets.
- Empty the sink strainer and wipe down the sink after cleaning pots, pans, and plates. Food residue can create mold and lingering smells.
- Wipe down cabinet exteriors weekly with a damp cloth.
Spring Cleaning FAQs
Ready to dive into spring cleaning but not sure where to start? Check out these spring cleaning FAQs for more information.
What Is Included in a Spring Clean?
A spring clean includes tasks that typically aren’t covered in your traditional cleaning routine, such as dusting ceiling fans, cleaning appliances, or even resealing grout. It’s a good opportunity to focus on the areas of your home that you often don’t see or pay much attention too.
What Month Is Spring Cleaning?
Historically, spring cleaning became a Great Lent tradition during the first week of April—which is often referred to as “clean week.” However, spring cleaning is now used metaphorically for any kind of thorough cleaning. Any month can be your designated cleaning month!
What Should I Get Rid of During Spring Cleaning?
If you choose to reorganize during spring cleaning, consider getting rid of things you have no use for, such as:
- Unworn or ill-fitting clothes
- Old electronics
- Unnecessary paperwork
- Old makeup or toiletries
- Expired food
- Unused kids toys or clothes
- Garage clutter
Clearing your house of clutter takes time. We suggest tackling rooms one-by-one to avoid feeling overwhelmed. If you struggle with deciding what to keep and what to toss or give away, think about the last time you used something. If it was more than a year ago, you likely don’t need it.
Is Spring Cleaning Necessary?
While many people consider spring cleaning the time refresh and reorganize, it isn't necessary. If you are satisfied with the tidiness of your home, it's up to you to forego spring cleaning. However, there are areas of your home do require periodic cleaning, such as your dryer, oven, and air vents.
This spring cleaning kitchen checklist may feel a bit overwhelming, but starting the season off with a sparkling, fresh kitchen will be worth it. Take your time when undergoing a kitchen deep clean and pay attention to detail. No one is expecting you to complete all these tasks in a day!
If you think your kitchen could use more than just a spring cleaning, check out some kitchen makeovers or kitchen design trends for inspiration.
Browse our selection of kitchen cabinets to revitalize your kitchen design.