kitchen remodeling
How To Install Crown Molding On Kitchen Cabinets
by Andrew Saladino
April 4, 2020
With everyone spending more time inside to maintain social distancing guidelines, many people are interested in projects they can do on their own at home. Installing crown molding on kitchen cabinets is one project that takes a little bit of skill but is totally doable.
Crown molding can give your cabinets an extra air of charm and sophistication. There are dozens of sizes and patterns to choose from, and you can even combine multiple moldings for a chunky look. We’re going to go over all the tools you’ll need and steps you’ll take to install crown molding on kitchen cabinets here.
Tools And Materials
Here’s what you’ll need to complete this project:
- Crown molding
- Backing wood strips (2×2 or 3/4-in x 1-1/2-in)
- Wood glue
- Hammer and nails
- Miter saw
- 18-gauge nail gun and air compressor
- Drywall hole patch
A miter saw is an essential tool for this project. If you don’t have one, consider picking one up. They are portable and useful for many different projects. Here, you’ll use one to cut the crown molding at precise angles.
The same goes for a good nail gun. Driving nails into crown molding with a hammer can be tedious, plus there’s a chance you can dent the face of the molding.
Step 1: Make The Base
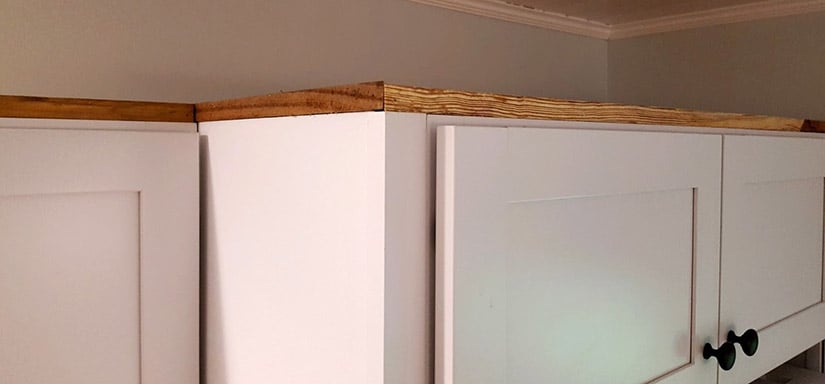
The first step is to cut pieces of filler wood and create a base that the crown molding will be nailed to later on. You can see this in the photo above. The wood strips go along the top of the cabinets and will be covered up later.
Measure out lengths of wood that will go along the entire top edge. You want to have the pieces join at 45 degree angles at the corners so you have a good base under the corners of the molding. Attach the pieces with wood glue to the top of your cabinets.
In this case, there is not enough space above the cabinet door to attach the molding to, which is why the filler wood is needed. However, if your cabinets extend a couple of inches above the tops of the doors, you have the option of attaching the crown molding directly to the cabinets and skipping this step.
Step 2: Start On The Side
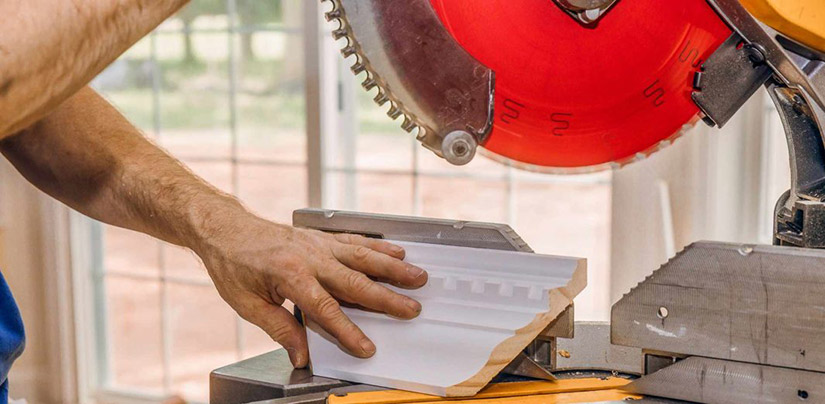
Pick one side of your cabinet to start with. Measure out and cut a length of crown molding that is at least a few inches longer than the side of your cabinet. Next, hold up the piece to the side of the cabinet, flush against the wall, and mark where you’ll make a 45-degree cut for the corner.
Set your miter saw to 45 degrees. This is an outward angle, so the top edge of the molding will be longer than the bottom edge. You should position the molding strip so that the flat vertical and horizontal faces are pressed against the table and saw fence. Since you’ll be cutting multiple molding strips, you can temporarily glue two strips of wood to the table to use as guides (on the non-rotating part).
Cut the strip exactly where you made the mark at 45 degrees. Next, line up the bottom edge of the molding with the top edge of the cabinet and nail it into the backing wood. If you are nailing it straight into your cabinet, remember to keep a 1/8-inch space above your doors to let them open freely.
Step 3: Repeat On The Front
Cut a molding strip at least 8 inches longer than the length of the front of your cabinet. Miter the edge that meets the first strip of crown molding and hold the ends together. Have a partner mark off where the other 45-degree cut should go for the next corner.
Miter that end of this strip and then attach it to the backing wood with the nail gun. Where molding pieces meet, nail through both pieces to make the connection secure.
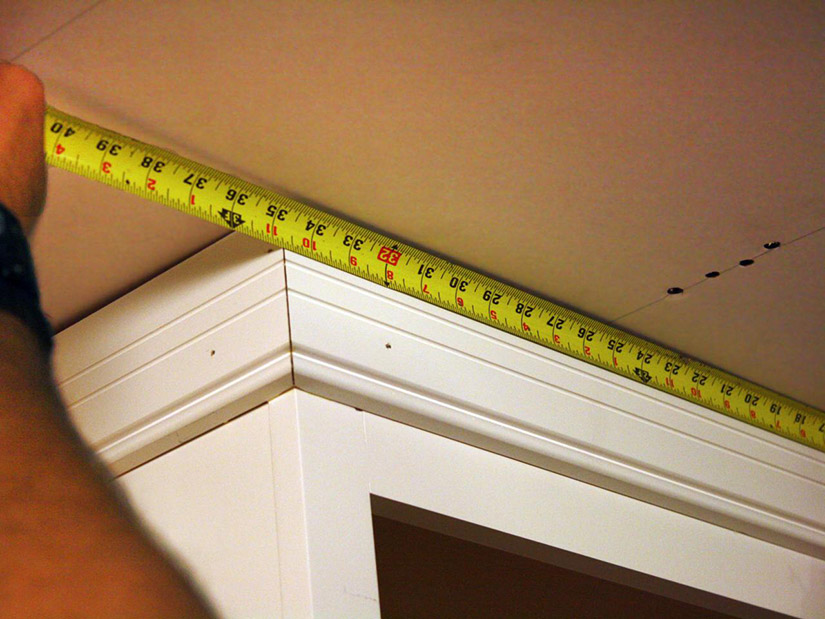
Step 4: Finish the last edge

You already have the straight edge on the piece, so you want to cut a nice 45-degree angle to fit with the front molding. Start by cutting the piece about a quarter inch too long. Shave off small amounts with your miter saw and keep checking until the piece fits snugly. Nail it in like the others.
Step 5: Touch Up And Paint

Now, you have your pieces of crown molding nailed into the backing wood and everything lines up. You might still see small gaps where the corners meet, and you’ll also see nail holes. Use some drywall hole patch to fill in the gaps and smooth out the surface.
Lastly, use two coats of paint to make the molding match your cabinet finish. If your cabinets use a wood stain, things can get a little tricky. Ideally, you’d want to take one of your cabinet doors into a home improvement store and ask an expert which stain you should use for your molding strips. Right now, you might not be able to go into a store. In this case, you can get a handful of wood stain samples online and test them out on unused pieces of molding.
Other Considerations
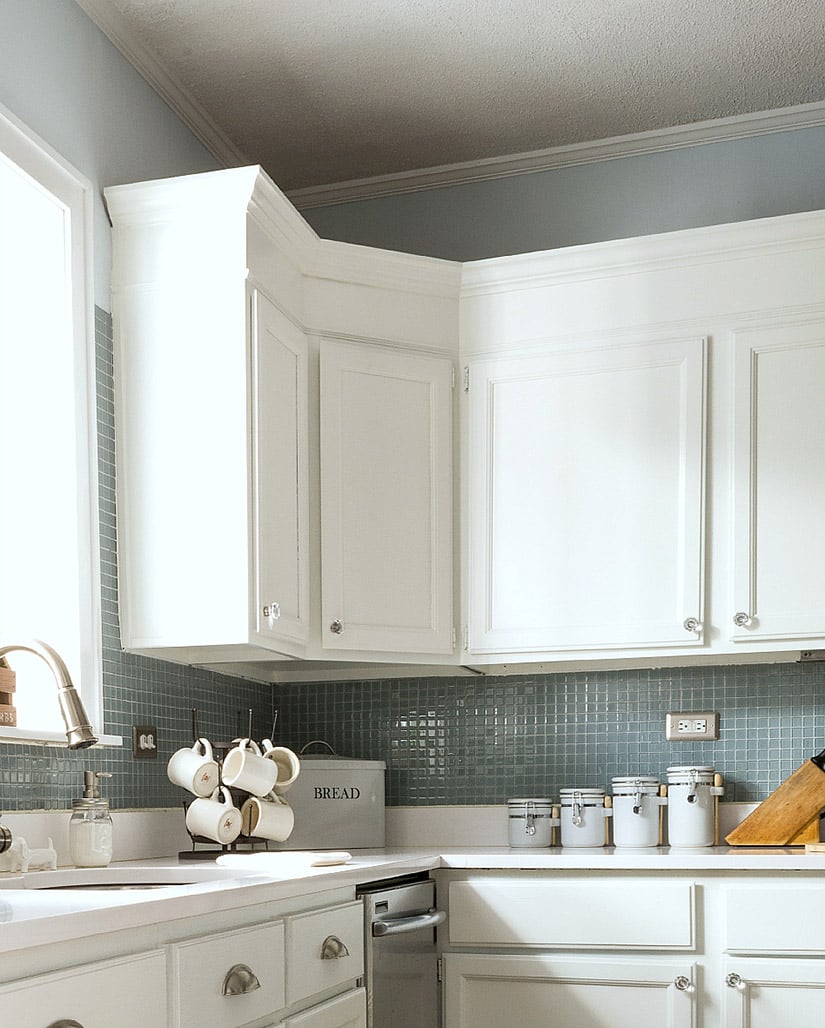
Of course, different kitchens have different configurations. If you have a galley kitchen or a kitchen with many cabinets on one wall, you might have to splice together sections of molding to cover the front side. The basic idea is the same, but use wood glue and nails to hold the spliced pieces together where they meet.
Your kitchen might also have a corner cabinet ? this is common in L-shaped kitchens. The cabinets on either side will meet the corner cabinet at 135-degree angles. But this time, the angle is toward the kitchen rather than toward the wall. So you’ll miter these edges at 67.5-degree angles but going the opposite direction.
Andrew Saladino
Andrew Saladino is the Co-Founder of Kitchen Cabinet Kings and has helped more than 10,000 customers design kitchens that are both stylish and built to last. Recognized by the NKBA for his expertise in kitchen design, he believes the secret to a successful remodel comes down to planning, patience—and plenty of caffeine.


