Kitchen
5 Surprisingly Easy Ways to Make Stock Cabinets Look Custom
by Andrew Saladino
January 5, 2026
Your kitchen cabinets define the entire space, but a full custom cabinet installation can cost tens of thousands of dollars, at an average rate of $400-500 per linear foot.
The good news? You don’t need to gut your kitchen to get that high-end, custom look. With a few strategic upgrades, you can transform basic stock cabinets into a designer feature that looks like it belongs in a magazine.
These five simple upgrades will help you make stock cabinets look custom without breaking the bank. Each method requires minimal tools and can be completed over a weekend, giving you maximum impact for your time and money.
Here’s how to customize your cabinets with minimal cost, and minimal stress.
Swap Basic Hardware for Statement Pieces
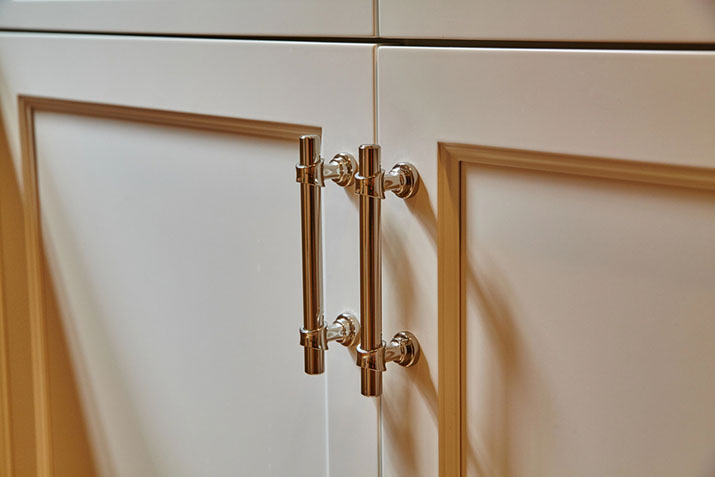
The fastest way to upgrade stock cabinets is by replacing generic hardware with statement pieces. It may help to think of cabinet hardware as jewelry for your kitchen: the right pieces can transform boring doors into eye-catching focal points.
Exploring Finishes and Styles
Stock cabinets typically come with basic brushed nickel or chrome knobs and pulls. When you switch to unique hardware, you instantly add personality and visual interest. Brass hardware brings warmth and elegance, while matte black creates a modern, sophisticated look. For a vintage farmhouse vibe, consider oil-rubbed bronze or antique copper finishes.
Sizing and Placement
Size matters when choosing hardware. Longer pulls (8-12 inches) make cabinets appear larger and more substantial. For upper cabinets, try sleek bar pulls, while lower cabinets look great with chunky, oversized knobs or handles.
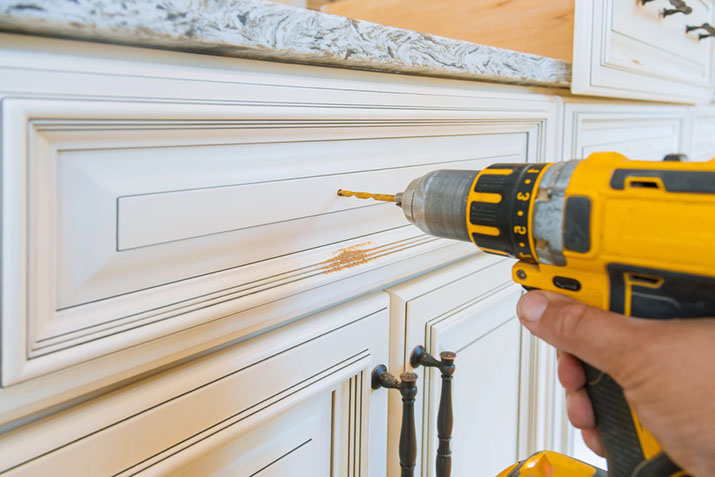
Installation and Cost
The best part? This upgrade costs between $3-15 per piece and requires only a screwdriver. If your new hardware doesn’t match existing holes, use a drill to create new ones and fill old holes with wood filler. Most homeowners can complete this project in just a single afternoon, spending $150-300 total to transform their entire kitchen.
Add Crown Molding or Trim for a Custom Look
Nothing says “custom” like trim and crown molding. This architectural detail bridges the gap between your cabinets and ceiling, or even on the cabinet doors themselves, creating a built-in appearance that makes stock cabinets look like they were designed specifically for your space.
Choosing Your Profiles
Crown molding comes in various profiles, from simple coves to elaborate traditional designs. For modern kitchens, choose clean, minimal profiles. Traditional spaces call for more ornate molding with multiple curves and details. Light rail molding under upper cabinets creates shadow lines that add depth and dimension.
Installation Basics and Impact
Installing crown molding requires basic carpentry skills and tools like a miter saw, but many home improvement stores offer pre-cut pieces and installation services. You can also add decorative trim to cabinet doors themselves, creating raised panel effects that mimic expensive custom work.
Though this upgrade is simple, the visual impact is dramatic. Crown molding makes standard 8-foot ceilings appear taller and gives your kitchen a finished, polished look. You can expect to spend $200-600 on materials, depending on your kitchen size and molding complexity.
Use a Two-Tone Paint Scheme
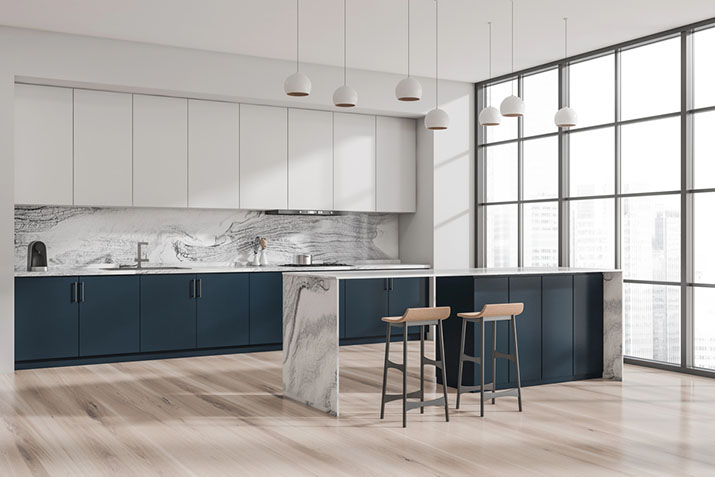
Painting cabinets is perhaps the most transformative way to make stock cabinets look custom. But instead of painting everything one color, try a two-tone approach that adds visual interest and depth to your kitchen design.
Popular Color Combinations
Some of our favorite combinations include navy lower cabinets with white uppers, sage green islands with cream perimeter cabinets, or charcoal gray lowers with light gray uppers. This technique creates focal points and defines different areas of your kitchen.
When choosing colors, consider your kitchen’s natural light and existing finishes. Darker colors work well on lower cabinets because they hide scuffs and fingerprints, while lighter colors on upper cabinets keep the space feeling open and airy.
Preparation and Application
Proper preparation is key to achieving professional results. Remove doors and drawers, clean all surfaces, and sand lightly to help paint adhere. Use high-quality primer and cabinet-specific paint for durability. A paint sprayer gives the smoothest finish, but high-quality brushes and rollers work too.
The entire project costs $200-500 in supplies but requires some patience. Plan for at least a week to complete all coats and curing time. The payoff is enormous: painted cabinets look completely custom and can update your kitchen’s style from traditional to modern, farmhouse to contemporary.
Install Under-Cabinet Lighting
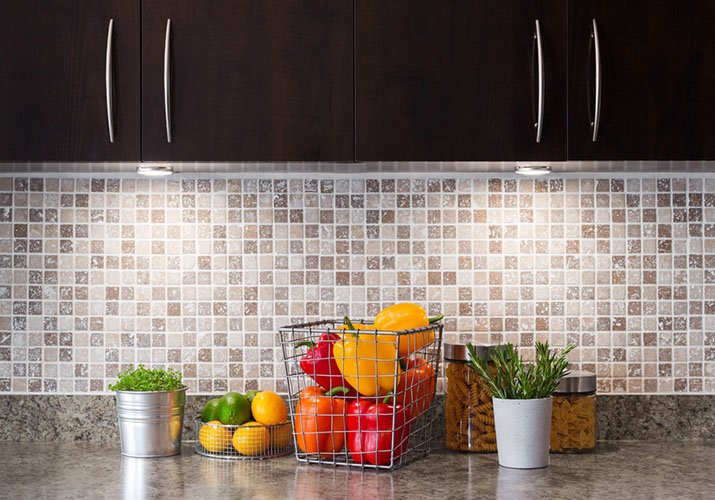
Under-cabinet lighting takes your kitchen from functional to fabulous in a flash. This upgrade provides both practical task lighting for cooking and ambient lighting that makes your space feel warm and inviting.
Choosing Light Types
LED strip lights are the most popular choice because they’re energy-efficient, long-lasting, and produce even illumination. They come in warm white (cozy, restaurant-like glow) or cool white (bright, crisp light for tasks). Puck lights create pools of focused light, perfect for highlighting specific work areas or decorative elements.
Installation Options
Battery-operated options require no electrical work: just stick them under the cabinets and you’re done. Hardwired systems look cleaner with no visible cords but require some basic electrical knowledge or investing in professional installation. You can also go one step further and install smart LED strips, which can be controlled via apps, allowing you to adjust brightness and color temperature throughout the day.
Upgrade to Soft-Close Hinges and Drawer Slides
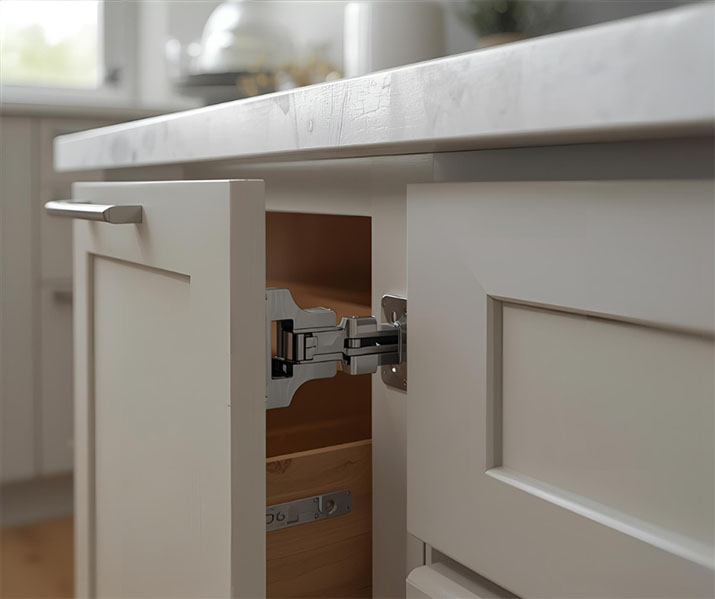
Nothing screams “cheap cabinets” like doors and drawers that slam shut. Upgrading to soft-close hardware adds an instantly noticeable luxury feel that makes stock cabinets seem high-end.
Soft-close hinges use hydraulic dampeners to gently pull doors closed the last few inches, preventing slamming and reducing wear on your cabinets. Similarly, soft-close drawer slides make sure drawers glide smoothly and close quietly, even when they’re loaded with dishes or cookware.
This upgrade extends your cabinets’ lifespan by reducing stress on joints and hinges. It also creates a more peaceful kitchen environment: no more cabinet doors waking sleeping family members or startling your guests.
A Simple Installation
Installation is straightforward: remove existing hinges and slides, then replace them with soft-close versions. Most soft-close hinges are adjustable, allowing you to fine-tune door alignment for a perfect fit.
Get an Affordable Kitchen Cabinet Makeover Today
These five upgrades prove you don’t need a complete kitchen renovation to achieve a custom look.
Start with one or two upgrades that fit your budget and timeline, focusing on the details that matter most to you. Hardware changes and under-cabinet lighting provide immediate impact with minimal investment. Crown molding and painting require more time but deliver dramatic results, while soft-close upgrades add daily luxury that improves your kitchen experience.
The total investment for all five of these upgrades, should you choose to partake in them all, typically runs $800-2,000, which is a fraction of what new custom cabinets would cost. More importantly, these changes help you create a kitchen that reflects your personal style while increasing your home’s value all at the same time.
Your kitchen makeover is just a weekend project away. Choose the upgrades that excite you most and start creating the custom look you’ve always wanted!
Frequently Asked Questions
Is it worth upgrading stock cabinets instead of replacing them?
Yes, given that replacing cabinets often starts at $15,000, upgrading is a much higher-ROI choice. Provided your existing cabinet boxes are structurally sound, you can achieve a similar high-end look through paint, hardware, and molding upgrades for typically under $1,500.
What is the biggest mistake people make when painting cabinets?
The biggest mistake is skipping the cleaning and preparation phase. Kitchen cabinets are covered in invisible grease that prevents paint from adhering, leading to peeling within months. You must thoroughly clean with a degreaser, scuff-sand the surface, and use a high-quality bonding primer before painting.
Do upgraded stock cabinets last as long as custom cabinets?
No, because stock cabinets generally use less durable materials (like MDF) compared to custom plywood construction. However, upgrades like quality paint and soft-close hinges do significantly extend the life of stock cabinets by sealing out moisture and reducing daily wear on the frames.
What is the cheapest way to make cheap cabinets look expensive?
The single cheapest upgrade with the highest visual impact is swapping out hardware. Replacing undersized, generic knobs with longer, heavier pulls in finishes like matte black or brass tricks the eye into thinking the cabinetry itself is more substantial and expensive.
Andrew Saladino
Andrew Saladino is the Co-Founder of Kitchen Cabinet Kings and has helped more than 10,000 customers design kitchens that are both stylish and built to last. Recognized by the NKBA for his expertise in kitchen design, he believes the secret to a successful remodel comes down to planning, patience—and plenty of caffeine.
![See your dream kitchen in 3D [GET YOUR FREE DESIGN]](https://cdn.kitchencabinetkings.com/blog/wp-content/uploads/see-your-dream-kitchen-in-3d.webp)
![Contractor Discount Program: Offering contractors and builders special volume discounts on all applicable orders [LEARN MORE]](https://cdn.kitchencabinetkings.com/blog/wp-content/uploads/contractor-discount-program.webp)
![Explore our photo gallery [GET INSPIRED]](https://cdn.kitchencabinetkings.com/blog/wp-content/uploads/explore-our-photo-gallery.webp)
![What everyone is saying about KCK [READ REVIEWS]](https://cdn.kitchencabinetkings.com/blog/wp-content/uploads/what-everyone-is-saying-about-kck.webp)
![Get a cabinet sample [SHOP SAMPLES]](https://cdn.kitchencabinetkings.com/blog/wp-content/uploads/get-a-cabinet-sample.webp)
![Pay over time, on your terms with Affirm [LEARN MORE]](https://cdn.kitchencabinetkings.com/blog/wp-content/uploads/pay-over-time-on-your-terms-with-affirm.webp)


