Kitchen
How to Seal Butcher Block Countertops: A Complete Guide
by Andrew Saladino
June 8, 2026
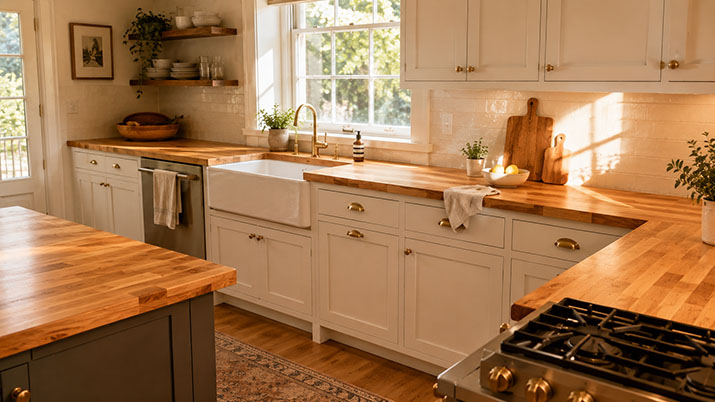
Butcher block countertops bring warmth, character, and a natural feel to a kitchen that no other material can match. But wood and water are not friends. Without a proper seal, your countertops will absorb moisture, collect stains, and start showing wear faster than you would expect.
The good news: sealing butcher block is a straightforward DIY project that protects your investment and keeps the wood looking great for years. The process takes an afternoon, requires a handful of tools you probably already own, and makes a dramatic difference in how the surface handles daily kitchen life.
This guide walks through every step of the sealing process, from choosing the right sealer for your situation to maintaining the finish long after the last coat dries. Whether you are sealing a brand-new countertop before installation or refreshing one that has seen a few years of use, the steps below will get you there.
Which Sealer Is Best for Butcher Block Countertops?
Before you pick up a brush, you need to pick a sealer. This decision affects how the countertop looks, how it holds up to daily use, and whether you can prep food directly on the surface. Each option has trade-offs, and the right choice depends on how you use your kitchen.
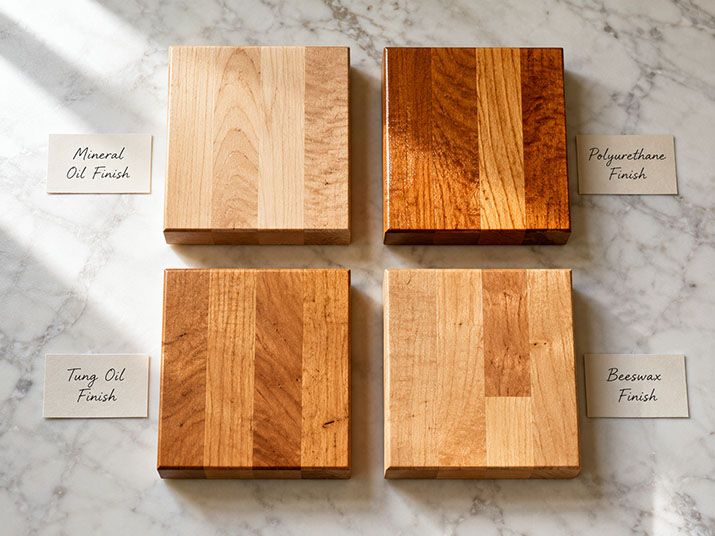
Mineral Oil
Mineral oil is the most popular starting point for butcher block, and for good reason. It is food safe (FDA-compliant when labeled as food-grade or USP-grade), inexpensive, and easy to apply. You pour it on, spread it with a cloth, let it soak in for 20 to 30 minutes, and wipe off the excess. No brush, no fumes, no special technique.
The trade-off is maintenance. Mineral oil penetrates the wood but does not build a protective surface film. It conditions the wood and slows moisture absorption, but it will not stop a puddle of water from soaking in if you leave it sitting. You will need to reapply every two to four weeks for the first few months, then roughly once a month after that. Mineral oil can also transfer to papers or items left on the counter, which catches some homeowners off guard.
Best for: households that want a natural, matte look and do not mind regular upkeep. Also the best choice if you cut food directly on the countertop surface.
Popular products: Howard Butcher Block Conditioner (mineral oil plus beeswax and carnauba wax), Minwax Food-Grade Wood Oil and Conditioner, and generic USP-grade mineral oil from any pharmacy.
Polyurethane
Oil-based polyurethane is the most durable option for butcher block. It creates a hard, plastic-like film on the surface that resists water, stains, and scratches better than any other finish on this list. A properly applied polyurethane finish can last three to five years before needing a refresh, which is a fraction of the maintenance mineral oil demands.
The trade-offs: polyurethane is not food safe for direct food contact. Once you seal with poly, you need to use a cutting board for food prep. It also adds a slight amber tint that deepens over time (some homeowners love this warmth, others do not). Application requires more technique: you need to sand between coats, work in a well-ventilated space, and wait 24 hours between coats. The fumes during application are strong.
Best for: countertops where durability and low maintenance are the priority, and where you will always use a cutting board for food prep.
Popular products: Minwax oil-based polyurethane, General Finishes Arm-R-Seal, and Varathane oil-based poly.
Tung Oil and Tung Oil Blends (Waterlox)
Tung oil sits between mineral oil and polyurethane in both durability and maintenance. Pure tung oil penetrates the wood and builds a natural, water-resistant film over multiple coats. It is FDA-approved for food contact once fully cured (which takes about 30 days). The finish is a warm, satin glow that brings out the wood grain without the plastic look of polyurethane.
Waterlox is the most popular tung-oil-based finish for butcher block. It is a blend of tung oil and resin that builds a more durable film than pure tung oil alone. You apply three to five coats with 24 hours of drying time between each coat, and the result is a surface that resists water far better than mineral oil while still looking and feeling like real wood.
The trade-off is application time. Three to five coats over three to five days is a commitment. The fumes are moderate (less than polyurethane, more than mineral oil). Reapplication is needed every one to two years, depending on wear.
Best for: homeowners who want a middle ground between the low maintenance of polyurethane and the natural look of mineral oil. A strong choice for kitchen islands and countertops that see moderate daily use.
Wax
Beeswax and carnauba wax create a soft, low-sheen finish that feels smooth to the touch. Wax is food safe, easy to apply (rub on with a cloth, buff to a sheen), and gives the wood a warm, hand-rubbed look that photographs well.
The trade-off: wax is the least durable option on this list. It sits on the surface rather than penetrating the wood, which means it wears away faster than oil or polyurethane. Wax works best as a topcoat over mineral oil or tung oil rather than as a standalone sealer. On its own, it will not protect against heavy water exposure or heat.
Best for: a finishing layer over another sealer, or for low-use surfaces like a decorative butcher block that does not see daily cooking traffic.
Epoxy
Epoxy resin creates the thickest, most durable barrier of any finish option. It pours on as a liquid, self-levels, and cures into a hard, glossy, waterproof surface that resists heat, scratches, and stains. Once cured, an epoxy finish can last a decade or more with minimal maintenance.
The trade-off: epoxy changes the look of your countertop. The thick, high-gloss finish covers the natural texture of the wood, and the result looks more like a bar top than a farmhouse kitchen counter. Epoxy is also difficult to repair. If it chips or yellows (cheaper epoxies can yellow over time from UV exposure), you cannot spot-fix it. You would need to sand the entire surface and reapply. It is the most expensive option and the hardest to apply correctly.
Best for: high-traffic commercial kitchens, bar tops, or homeowners who want maximum protection and do not mind losing the natural wood feel.
How to Seal Butcher Block Countertops in 6 Steps
With your sealer chosen, it is time to get to work. The steps below apply to polyurethane and tung oil finishes, which are the two most common sealers for residential butcher block countertops. If you are using mineral oil, the process is simpler (apply, soak, wipe, repeat) and does not require sanding between coats.
Step 1: Gather Your Materials
Before you start, have everything within arm’s reach. You will need:
- 220-grit sandpaper (a sanding block or orbital sander for larger surfaces)
- Two to three clean, lint-free microfiber cloths
- Your chosen sealer (polyurethane, tung oil, Waterlox, or mineral oil)
- A natural-bristle brush or foam roller (for polyurethane and tung oil)
- Mineral spirits (for cleaning the brush and for a smoother polyurethane application)
- Painter’s tape (to protect walls, backsplashes, and adjacent surfaces)
- Disposable gloves
A few of these items deserve a note. The 220-grit sandpaper is specific: coarser grits (80 or 120) will leave visible scratch marks under the sealer, and finer grits (320 or higher) will not create enough texture for the sealer to grip. 220 is the sweet spot. If you are covering a large countertop, an orbital sander saves significant time and produces a more even result than sanding by hand.
Step 2: Sand the Surface
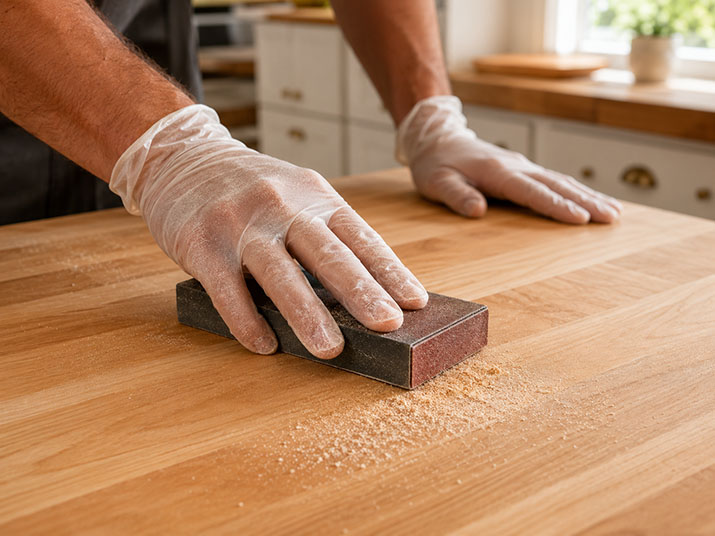
Sanding prepares the surface for the sealer by removing rough spots, minor stains, and any raised grain from previous moisture exposure. Using your 220-grit sandpaper, sand the entire countertop surface in the direction of the wood grain. Going against the grain creates cross-hatching scratches that will show through the sealer, so follow the lines of the wood.
You do not need to sand down to bare wood (unless the countertop has a previous finish you want to remove). A light, even pass across the surface is enough to smooth imperfections and give the sealer something to grip. Run your hand across the surface when you are done. It should feel uniformly smooth with no rough patches or raised edges.
Step 3: Clean the Surface
Dust from sanding will ruin your finish if it gets trapped under the sealer. Wipe the entire surface with a clean, damp microfiber cloth to pick up all the sanding dust. Then let the countertop dry completely. This usually takes 15 to 30 minutes depending on humidity. The surface should feel dry to the touch and show no dark spots from moisture before you move to the next step.
If your countertop has any existing stains or odors, this is the time to address them. A mixture of equal parts white vinegar and water, wiped on and left for 10 minutes before wiping clean, works as a mild sanitizer. Let the surface dry fully before applying sealer.
Step 4: Apply the Sealer
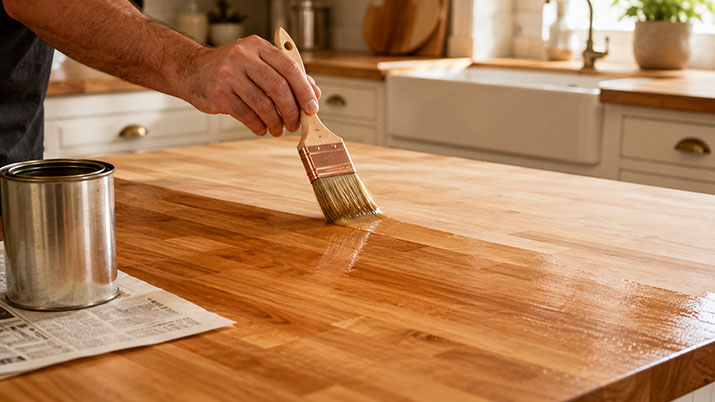
Pour a small amount of sealer onto the countertop and spread it across the surface with your brush or foam roller, working in the direction of the grain. Thin, even coats are better than thick ones. A heavy coat will pool, bubble, and take longer to dry, and the finish will look uneven when it cures.
Cover the entire surface, including the front edge and any exposed side edges. These edges are vulnerable to moisture and tend to get overlooked. If your countertop has a sink cutout, coat the exposed end grain inside the cutout as well (more on that in the sink section below).
For polyurethane specifically, dipping your brush in mineral spirits before loading it with poly creates a smoother application. The mineral spirits thin the first stroke slightly and help the poly level itself as it dries.
Step 5: Allow the Sealer to Dry
Follow the manufacturer’s instructions for drying time. Most oil-based polyurethanes need 24 hours between coats. Tung oil and Waterlox also need about 24 hours. Mineral oil is faster: 20 to 30 minutes of soak time, then wipe off the excess.
During the drying period, keep the kitchen traffic to a minimum. Do not set anything on the countertop. Do not wipe it. Do not test it with water. The sealer needs uninterrupted time to cure, and anything that touches the surface during this window will leave a mark.
Temperature and humidity affect drying time. Aim for 60 to 80 degrees Fahrenheit with moderate humidity. Cold, damp conditions can double the drying time and cause the finish to cloud.
Step 6: Sand Lightly and Apply Additional Coats
After the first coat has dried completely, run your hand across the surface. It will feel rough. That roughness is raised wood grain, and it is normal. Take your 220-grit sandpaper and give the surface a light, gentle pass. You are not removing the first coat of sealer. You are knocking down the raised grain so the next coat goes on smooth.
Wipe away the sanding dust with a clean, damp cloth. Let the surface dry. Then apply your second coat using the same technique as the first.
For polyurethane, apply two to three total coats. For tung oil or Waterlox, apply three to five total coats. Sand lightly between each coat. The final coat should not be sanded. Let it cure fully (most polyurethanes are fully cured after 72 hours, though light use is fine after 24).
How to Seal New Butcher Block Before Installation
If you are installing a brand-new, unfinished butcher block countertop, seal it before the installer puts it in place. This is your only chance to coat all six sides of the slab: top, bottom, front edge, back edge, and both ends.
The bottom and edges matter more than most homeowners realize. Moisture from the cabinets below, from spills that drip over the edge, and from humidity in the room all attack the underside and edges of the countertop. If only the top is sealed, moisture enters from the bottom and causes the wood to cup, warp, or swell unevenly.
Seal every surface with at least one coat of your chosen finish. The top surface gets the full multi-coat treatment described above. The bottom and edges can get away with one to two coats since they do not see direct wear, but they need coverage.
If your countertop includes a sink cutout, seal the exposed end grain inside the cutout before the sink is installed. End grain absorbs moisture ten times faster than face grain, and the sink area is the wettest zone in the kitchen. Two to three coats of sealer on the cutout edges will save you from premature water damage.
How to Seal Butcher Block Around a Sink

The area around the sink is where butcher block countertops fail first. Water splashes, drips, and pooling around the faucet base put this zone under constant moisture stress. If the seal breaks down here, the wood darkens, swells, and can start to rot within a few months.
Protect this area with extra attention:
Seal the end grain inside the sink cutout. End grain (the cross-section of the wood fibers) absorbs water at a much faster rate than the face grain on the top surface. Apply two to three extra coats of sealer to every exposed edge inside the cutout. If you are using polyurethane, this is one area where a slightly thicker coat is acceptable because you want maximum moisture protection.
Apply a bead of clear silicone between the sink and the countertop. Even with a well-sealed surface, the joint between the sink rim and the wood is a potential entry point for water. A thin bead of 100% silicone caulk (not latex) around the perimeter of the sink creates a waterproof gasket.
Wipe up standing water immediately. No sealer is a substitute for common sense. If water pools around the faucet or the soap dish, wipe it up. Even a polyurethane finish will break down over time if water sits on it day after day.
Reseal the sink area more frequently. If you are using mineral oil or tung oil, the area within six inches of the sink should get an extra application every time you oil the rest of the counter. If you are using polyurethane, inspect the sink zone every six months for signs of wear (cloudiness, peeling, or water that no longer beads on the surface).
Can You Stain Butcher Block Before Sealing?
Yes. If you want to change the color of your butcher block (darker, richer, or a specific tone to match your kitchen cabinets), you can stain the wood before applying your sealer. The process adds a step, but it is straightforward.
Sand the surface to 220-grit, clean off the dust, and apply your stain according to the manufacturer’s directions. Most oil-based wood stains need 24 hours to dry before you can apply a topcoat. Once the stain is fully dry, proceed with your chosen sealer using the same steps outlined above.
One important rule: do not apply polyurethane over mineral oil, and do not apply mineral oil over polyurethane. These two finishes are incompatible. Polyurethane will not adhere to an oiled surface, and mineral oil will not penetrate a polyurethane film. If you stain first, choose your sealer before you stain and stick with it. Oil-based stain pairs with polyurethane. If you want to use mineral oil as your sealer, skip the stain and let the natural wood color speak for itself.
Common Butcher Block Sealing Mistakes to Avoid
Even an experienced DIYer can make these mistakes. Catching them before you start saves time, materials, and frustration.
Applying sealer over an oiled surface. Polyurethane and other film-building sealers will not bond to wood that has been treated with mineral oil. If your countertop has been oiled previously, you need to strip the oil completely (sand down to bare wood) before switching to polyurethane or tung oil. This is the most common and most costly mistake people make with butcher block.
Skipping the bottom and edges. Sealing only the top surface leaves five other sides exposed to moisture. The bottom is especially vulnerable because it sits directly over cabinets where humidity and condensation collect. At minimum, apply one coat of sealer to every surface before installation.
Applying coats that are too thick. A thick coat of polyurethane will bubble, pool in low spots, and take much longer to cure. Thin, even coats cure faster, bond better, and look smoother. Two thin coats outperform one thick coat every time.
Skipping the sand between coats. Each coat of sealer raises the wood grain slightly. If you apply the next coat without sanding, you lock that roughness into the finish permanently. A light pass with 220-grit between coats takes five minutes and makes a noticeable difference in the final texture.
Sealing in cold or humid conditions. Most sealers cure best between 60 and 80 degrees Fahrenheit with low to moderate humidity. Cold temperatures slow the cure, and high humidity can cause polyurethane to cloud or develop a milky haze. If you are sealing in a basement or garage, check the conditions before you start.
Using the countertop too soon. Light use (setting items on the surface) is fine after 24 hours for most sealers. Full cure, where the finish reaches maximum hardness, takes 72 hours for polyurethane and up to 30 days for tung oil. Putting a hot pan on a partially cured surface will leave a mark.
How to Maintain Sealed Butcher Block Countertops
A sealed butcher block countertop is low maintenance, but it is not no maintenance. These habits keep the finish intact and the wood in good condition.
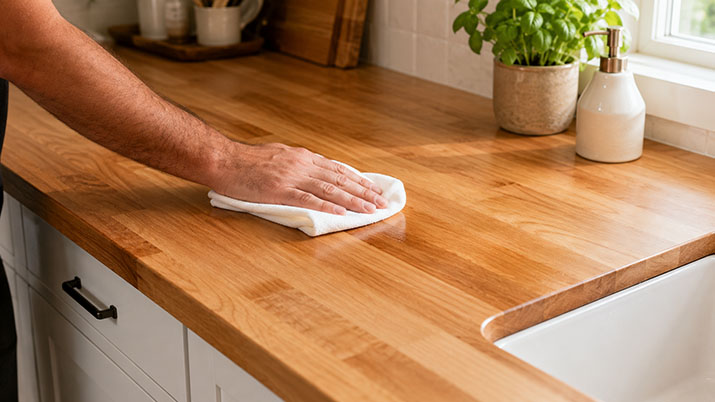
Daily cleaning. Wipe the surface with a damp cloth and mild dish soap at the end of each day. Avoid abrasive sponges and scouring pads, which scratch the sealer. For a deeper clean, spray a mixture of one part white vinegar to two parts water, let it sit for a minute, then wipe dry.
Avoid harsh chemicals. Bleach, ammonia, and harsh all-purpose cleaners break down polyurethane and strip oil finishes. Stick with mild soap and vinegar.
Wipe up spills immediately. Even a well-sealed countertop can absorb moisture if liquid sits on it long enough, especially around seams and edges. Get in the habit of wiping up water, juice, and oil as soon as you notice it.
Use cutting boards. If your countertop is sealed with polyurethane, always use a cutting board for food prep. Knife cuts scratch through the poly film and expose bare wood underneath. If your countertop is sealed with mineral oil and you want to cut directly on it, that is fine (mineral oil is food safe), but know that the surface will show knife marks over time.
Use trivets for hot pots and pans. No sealer is fully heat-proof. A hot pan placed directly on polyurethane will leave a white mark. On an oiled surface, it can scorch the wood. Trivets take two seconds to grab and save you a refinishing job.
Test the seal periodically. Sprinkle a few drops of water on the surface and watch what happens. If the water beads up and sits on top, your seal is intact. If the water soaks in and leaves a dark spot, it is time to reseal. Check every few months, paying extra attention to the area around the sink and the most-used prep zone.
Resealing schedule:
- Mineral oil: every 2 to 4 weeks initially, then once a month
- Tung oil / Waterlox: every 1 to 2 years
- Polyurethane: every 3 to 5 years
- Wax (as a topcoat): every 3 to 6 months
Upgrade Your Kitchen While You Are At It
If you are putting the time into refinishing your countertops, it is a natural moment to look at the rest of the kitchen. Freshly sealed butcher block paired with worn or outdated cabinets can make the contrast more noticeable, not less.
At Kitchen Cabinet Kings, we carry RTA kitchen cabinets and assembled kitchen cabinets in styles that pair well with butcher block countertops: warm wood tones, classic Shaker doors, and clean white finishes that let the wood counter take center stage.
If you want to see how new cabinets would look alongside your butcher block, order a cabinet door sample to hold next to your countertop and compare finishes in person. Or take it a step further with our free 3D kitchen design service, where an NKBA-certified designer builds a layout tailored to your space, your countertops, and your budget.
Frequently Asked Questions
What is the best sealer for butcher block countertops?
The best sealer depends on how you use your countertops. Polyurethane is the most durable and lowest-maintenance option, but it is not food safe for direct cutting. Mineral oil is food safe and easy to apply, but it requires monthly reapplication. Tung oil blends like Waterlox offer a middle ground: food safe once cured, more water-resistant than mineral oil, and lower maintenance than pure oil. For most residential kitchens, polyurethane or a tung oil blend is the strongest long-term choice.
Is it better to oil or seal butcher block countertops?
Oiling (with mineral oil) conditions the wood and is food safe, but it requires frequent reapplication and does not create a waterproof barrier. Sealing (with polyurethane or tung oil) builds a protective surface film that resists water and stains with far less maintenance. If you cut food directly on the countertop and want a natural look, oil is the better choice. If you want maximum durability and always use a cutting board, sealing is the better choice.
Can you seal butcher block with polyurethane?
Yes. Oil-based polyurethane is one of the most popular sealers for butcher block countertops. It creates a durable, waterproof film that lasts three to five years before needing a refresh. Apply two to three thin coats with 220-grit sanding between each coat. Keep in mind that polyurethane is not food safe for direct food contact, so you will need to use a cutting board for food prep.
Can you cut food on sealed butcher block?
It depends on the sealer. You can cut food directly on butcher block sealed with food-grade mineral oil, tung oil, or beeswax, as these finishes are FDA-compliant for food contact. You should not cut food on butcher block sealed with polyurethane or epoxy, as these finishes are not food safe and knife cuts will damage the protective film. Use a cutting board instead.
How often do you need to reseal butcher block countertops?
The frequency depends on the sealer type and how much wear the countertop gets. Mineral oil needs reapplication every two to four weeks initially, then about once a month. Tung oil and Waterlox blends last one to two years. Polyurethane lasts three to five years. Test your seal by sprinkling water on the surface. If the water beads up, the seal is intact. If it soaks in and leaves a dark spot, it is time to reseal.
How do you know if butcher block needs to be resealed?
Sprinkle a few drops of water on the countertop. If the water beads up on the surface, your sealer is doing its job. If the water absorbs into the wood and darkens the spot, the seal has worn through and the countertop needs a fresh coat. Other signs include the wood looking dry or lighter in color, visible water stains, or a rough texture where the finish has worn away.
Do you need to seal the bottom of butcher block countertops?
Yes. Moisture enters wood from every exposed surface, and the underside of a countertop is vulnerable to humidity and condensation from the cabinets below. Sealing the bottom with at least one coat prevents the wood from absorbing moisture unevenly, which causes cupping and warping. Seal all six sides (top, bottom, front edge, back edge, and both ends) before installation.
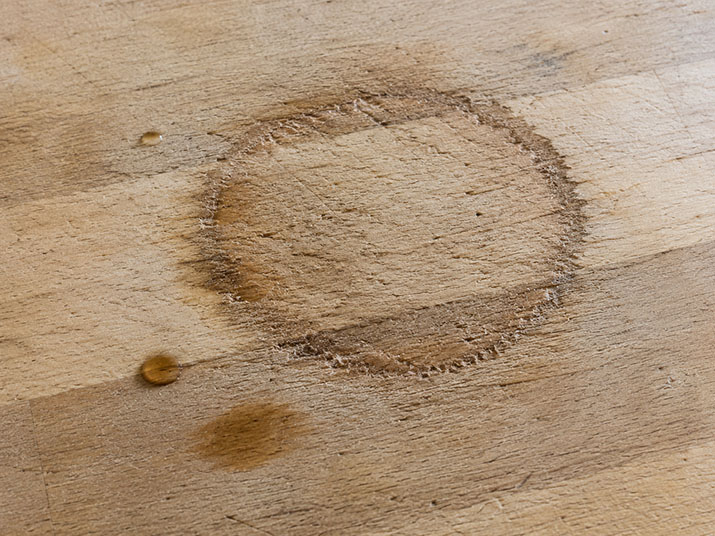
What happens if you do not seal butcher block countertops?
Unsealed butcher block absorbs water, cooking oils, and food stains quickly. Over time, the wood dries out, cracks, and develops dark spots from moisture damage. Around the sink, unsealed wood can swell, warp, and begin to rot within months. Bacteria also penetrate unsealed wood more easily, creating a hygiene concern for food preparation surfaces. Sealing protects both the appearance and the structural integrity of the wood.
How do you maintain sealed butcher block countertops?
Wipe the surface daily with a damp cloth and mild dish soap. Avoid abrasive cleaners, bleach, and ammonia, which strip the finish. Use cutting boards for food prep (especially on polyurethane-sealed surfaces) and trivets for hot pots and pans. Test the seal every few months with a water drop test. When water stops beading on the surface, it is time to apply a fresh coat of your chosen sealer.
Andrew Saladino
Andrew Saladino is the Co-Founder of Kitchen Cabinet Kings and has helped more than 10,000 customers design kitchens that are both stylish and built to last. Recognized by the NKBA for his expertise in kitchen design, he believes the secret to a successful remodel comes down to planning, patience—and plenty of caffeine.
![See your dream kitchen in 3D [GET YOUR FREE DESIGN]](https://cdn.kitchencabinetkings.com/blog/wp-content/uploads/see-your-dream-kitchen-in-3d.webp)
![Contractor Discount Program: Offering contractors and builders special volume discounts on all applicable orders [LEARN MORE]](https://cdn.kitchencabinetkings.com/blog/wp-content/uploads/contractor-discount-program.webp)
![Explore our photo gallery [GET INSPIRED]](https://cdn.kitchencabinetkings.com/blog/wp-content/uploads/explore-our-photo-gallery.webp)
![What everyone is saying about KCK [READ REVIEWS]](https://cdn.kitchencabinetkings.com/blog/wp-content/uploads/what-everyone-is-saying-about-kck.webp)
![Get a cabinet sample [SHOP SAMPLES]](https://cdn.kitchencabinetkings.com/blog/wp-content/uploads/get-a-cabinet-sample.webp)
![Pay over time, on your terms with Affirm [LEARN MORE]](https://cdn.kitchencabinetkings.com/blog/wp-content/uploads/pay-over-time-on-your-terms-with-affirm.webp)


