

13 Kitchen Landing Zone Ideas That Make Cooking Less Chaotic

by Andrew Saladino
August 3, 2026
A kitchen can have plenty of counter space and still feel frustrating to use.
Maybe there’s nowhere to set grocery bags beside the refrigerator. Or the coffee maker takes over the only open stretch of countertop, and clean dishes pile up because the storage cabinets are too far from the dishwasher.
These small problems don’t stay small long, and that’s where kitchen landing zones come in handy. Instead of adding more countertop wherever it fits, a thoughtful layout puts clear surfaces beside the appliances, storage areas, and routines that need them most.
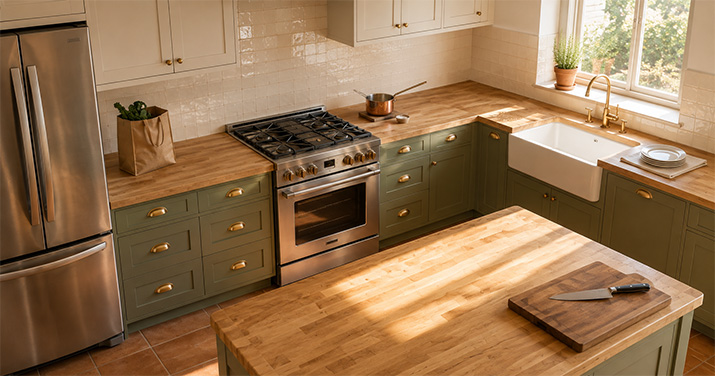
Quick Answer A kitchen landing zone is a clear countertop or surface next to an appliance where you can set items down during a task. NKBA guidelines recommend at least 15 inches of clear counter beside the fridge, 12 inches on one side of the range and 15 on the other, and 15 inches beside ovens and microwaves. Most kitchens need 5 to 8 landing zones to function well.
What Is a Kitchen Landing Zone?
A kitchen landing zone (sometimes called an appliance landing space or drop zone) is a nearby countertop, shelf, or work surface where you can safely set down items during a specific task. Think of it as the clear stretch of counter beside your fridge where you set grocery bags, the open surface next to the range where you rest a hot pan, or the space beside the dishwasher where you sort clean dishes before putting them away.
If you’ve heard of the traditional kitchen work triangle, landing zones are the next step. The work triangle maps movement between the sink, refrigerator, and cooking area. Landing zones go smaller and more specific: they support individual actions at individual appliances. A well-planned kitchen might have six or more landing zones, each tied to a specific routine. The fridge needs a spot for groceries. The range needs a spot for hot pans. The dishwasher needs a spot for clean dishes. The coffee maker needs room to prep a cup without moving everything else out of the way.
Here’s the thing most people don’t realize until it’s too late: more countertop doesn’t automatically make a kitchen easier to use. Location matters more than total square footage. A large island across the room may look impressive, but it won’t help much if there’s nowhere to set groceries beside the fridge or a hot pan beside the oven.
NKBA Landing Zone Guidelines by Appliance
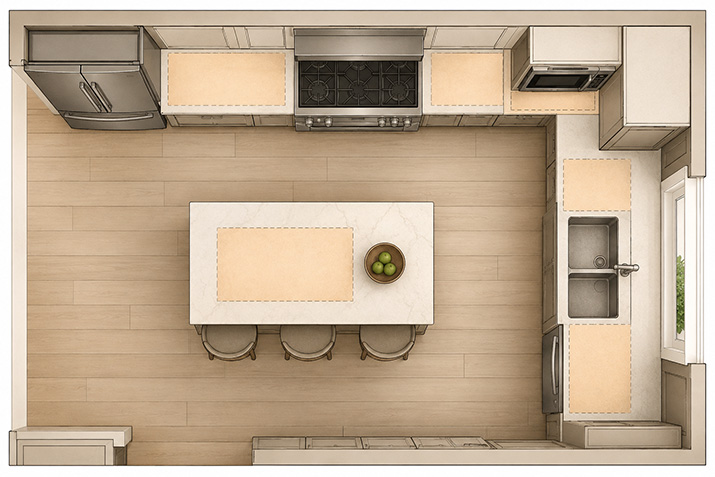
The National Kitchen and Bath Association (NKBA) publishes minimum landing zone recommendations for each major appliance. These are the numbers your designer or contractor should be working from. If your current kitchen falls short on any of these, that’s likely the source of whatever feels “off” about the layout.
Refrigerator
At least 15 inches of clear counter on the handle side of the door. If the fridge opens away from the counter (toward a wall or hallway), you can place 15 inches of landing space within 48 inches across from the fridge instead. The surface should be close enough that you don’t need to cross a walkway while carrying bags or containers.
Cooktop or Range
A minimum of 12 inches of landing space on one side and 15 inches on the other. If the cooktop sits in an island or peninsula, add 9 inches of counter behind the cooking surface (at the same height) to catch splatter and provide a resting spot for lids and utensils.
Oven (Wall or Range)
At least 15 inches of heat-safe counter beside the oven, or directly across from it if the oven doesn’t open into a walkway. For side-swing ovens, put the landing surface on the latch side so you’re not reaching over the open door.
Microwave
At least 15 inches of clear counter beside or below the microwave. If your microwave is built into a tall cabinet, a pull-out shelf directly beneath it works well. You need somewhere to set hot, awkward-to-handle dishes immediately after pulling them out.
Sink
At least 24 inches of counter on one side and 18 inches on the other. This is the busiest landing zone in most kitchens because it handles food prep, dish staging, produce rinsing, and the handoff to and from the dishwasher.
When Two Appliances Share a Landing Zone
If two appliances sit next to each other (a fridge beside a range, for example), the landing zone can overlap. The guideline: take the larger of the two requirements and add 12 inches. So a fridge (15 inches) beside a range (15 inches) would need a shared landing zone of at least 27 inches. This math comes in handy when you’re tight on space and need to size countertops during a cabinet planning and measuring phase.
Source: Dura Supreme, Kitchen Appliance Landing Areas, based on NKBA Kitchen Design Guidelines.
13 Kitchen Landing Zone Ideas
The following ideas go beyond basic appliance clearances and focus on the routines that shape how a kitchen works each day. They’re grouped by how much they involve: appliance zones that every kitchen needs, activity-based zones for specific routines, and non-cooking zones for the rest of daily life.
Appliance Landing Zones
1. Grocery Drop Zone Beside the Refrigerator
A grocery drop zone makes unloading bags faster and keeps food from piling up in a walkway. A short counter beside the fridge works best, but the end of an island or a nearby peninsula can serve the same purpose if it doesn’t require crossing a busy aisle.
Place it near: The refrigerator, freezer, or main kitchen entrance.
Store here: Reusable bags, produce baskets, food-storage containers.
2. Range-Side Prep Zone
A clear landing zone beside the range keeps ingredients, utensils, and cookware within arm’s reach while you cook. It’s tempting to fill the entire counter with small appliances, but leaving part of it open gives you a safe, convenient place to set down hot pans, prep ingredients, and stage serving dishes as you work.
Place it near: The cooktop or range, on the side you use most often.
Store here: Cooking oils, spices, utensils, cutting boards, pot holders.
3. Wall-Oven Landing Space
Wall ovens need a nearby surface for hot pans and baking dishes. Make sure the only landing surface isn’t in a spot where an open oven door blocks access to it.
Place it near: Beside the oven or directly across from it, as long as the route doesn’t cross a traffic path.
Store here: Oven mitts, trivets, baking sheets, cooling racks.
4. Microwave Landing Space
Microwave dishes are often hot, awkward to handle, and easy to spill. A nearby landing surface gives you a safe place to set them down right away. If your microwave is built into a tall cabinet, a pull-out shelf directly below it is a practical solution.
Place it near: Immediately beside or below the microwave.
Store here: Microwave-safe covers, bowls, potholders, quick snacks.
5. Sink-Side Cleanup Zone
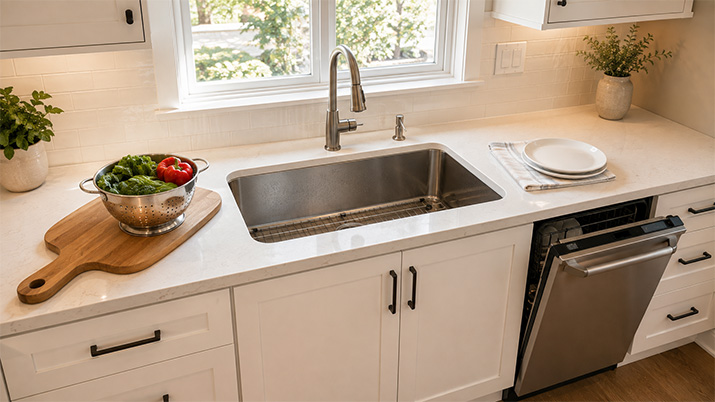
The cleanup zone handles more traffic than any other spot in the kitchen: dirty dishes, rinsed produce, food prep, and items waiting to be washed or dried. Pairing it with pull-out waste bins and under-sink organizers keeps cleaning supplies close at hand without cluttering the counter.
Place it near: The sink and trash or compost pullout.
Store here: Dish soap, scrubbers, towels, colanders, food-prep bowls.
6. Dishwasher Unloading Zone
The best dishwasher unloading zone is close to the cabinets and drawers that hold your everyday dishes. Even a small clear section of countertop helps when you’re sorting several items before putting them away. And if your dish storage happens to be on the opposite side of the kitchen from your dishwasher, that’s a layout problem worth fixing in your next remodel.
Place it near: Dish storage, flatware drawers, and glassware cabinets.
Store here: Dish towels, drying mats, frequently used dishes.
Activity-Based Landing Zones
7. Coffee-Making Station
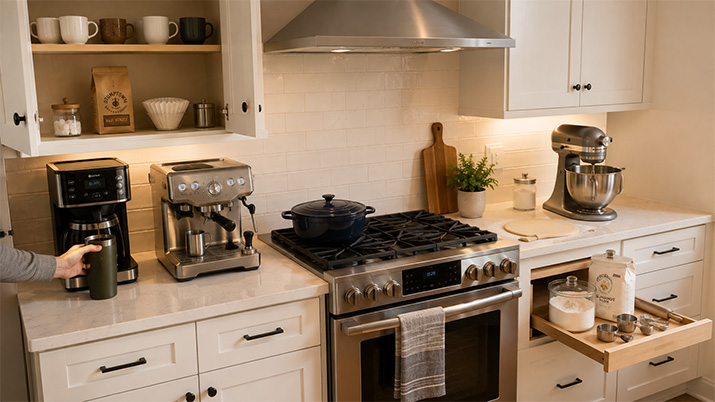
A dedicated coffee station keeps everything you need in one convenient spot: mugs, beans, filters, sweeteners, and an outlet. Equally important, leave enough clear counter beside the coffee maker to prep drinks, fill travel mugs, or set down supplies without having to shuffle other appliances out of the way.
Place it near: A water source, outlet, and mug storage.
Store here: Coffee, tea, sweeteners, travel mugs, filters, spoons.
8. Baking Station
A dedicated baking station keeps ingredients, tools, and workspace together so you’re not gathering supplies from all over the kitchen. Positioning it near the oven and pantry streamlines everything from measuring ingredients to transferring pans into the oven.
Place it near: The oven, pantry, or a wide stretch of countertop.
Store here: Mixing bowls, measuring cups, baking pans, flour, sugar, mixers.
9. Lunch-Packing Station
A dedicated lunch-packing station keeps weekday mornings organized by bringing together containers, snacks, and water bottles in one area. Keeping everything together reduces unnecessary trips across the kitchen and makes the routine faster for both kids and adults. A nearby drawer or cabinet can keep supplies organized while preserving valuable counter space.
Place it near: The refrigerator and pantry.
Store here: Lunch boxes, reusable containers, napkins, snacks, drink bottles.
10. Breakfast Station
A breakfast station makes busy mornings more efficient by grouping frequently used foods, appliances, and dishes together. If space is limited, this zone can easily share counter space with the coffee station, provided there’s enough room for both tasks without one crowding the other.
Place it near: The refrigerator, pantry, or breakfast seating.
Store here: Toaster, cereal, bowls, bread, spreads, utensils.
Non-Cooking Landing Zones
11. Mail and Key Drop Zone
Not every landing zone has to support cooking. A small drop zone near the kitchen entrance keeps keys, mail, school papers, and chargers from piling up on valuable prep surfaces. A shallow drawer, cabinet end, or wall organizer can contain the clutter without taking over the countertop.
Place it near: The kitchen entrance, mudroom, or family command center.
Store here: Keys, mail trays, pens, charging cords, calendars.
12. Pet-Feeding Prep Zone
A dedicated pet-feeding zone keeps food, bowls, treats, and supplies organized instead of scattered throughout the kitchen. Storing everything in one place makes feeding easier while keeping prep surfaces clear for cooking.
Place it near: A water source, pantry, or pet-feeding area.
Store here: Food containers, scoops, treats, medications, cleaning supplies.
13. Entertaining and Beverage Zone
A dedicated beverage zone lets guests help themselves without interrupting the main cooking area. It also creates a convenient place to prepare drinks, set out serving pieces, and keep entertaining supplies organized. Depending on your space, it can be as simple as a section of countertop with nearby storage or a dedicated bar area.
Place it near: The dining area, beverage refrigerator, or glassware storage.
Store here: Glasses, bottle openers, serving trays, napkins, drink supplies.
Common Landing-Zone Mistakes
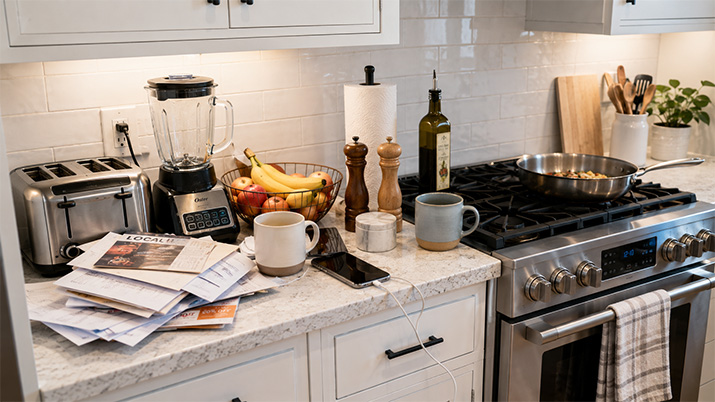
Even the best-designed landing zones lose their value if they’re blocked, overcrowded, or poorly placed. Here are the most common mistakes to avoid when planning your kitchen layout:
No surface beside a major appliance. A landing zone only works if it’s close enough to the task it supports. Without a nearby surface, you’ll end up carrying groceries, hot cookware, or dishes farther than necessary. Fix: add a short section of countertop, a pull-out shelf, an island end, or a movable cart near the appliance.
Landing space blocked by doors. Cabinet doors, appliance doors, and nearby entry doors can make a landing zone awkward or impossible to use when they’re all open at the same time. Fix: open every appliance and cabinet door during the planning process to make sure the landing surface stays accessible.
Too little clear counter. A narrow strip of countertop may look adequate on a floor plan, but it won’t leave enough room for grocery bags, mixing bowls, or hot baking dishes in real life. Fix: size each landing zone around the items you’ll actually use there, not the available space on the blueprint. Check our standard cabinet sizes guide to see how base cabinet widths (30-inch, 33-inch, 36-inch) translate to usable counter space.
Letting landing zones become catch-all spaces. Countertops quickly lose their usefulness when they’re permanently covered with mail, small appliances, decor, or miscellaneous clutter. Fix: give everyday items a designated storage spot and keep your primary landing zones as clear as possible.
Forgetting electrical outlets. Appliances like coffee makers, mixers, and blenders work best when power is available where you’ll actually use them. Fix: plan outlet locations at the same time you plan landing zones so your workspace is both functional and convenient. This is especially easy to overlook when choosing a kitchen layout.
Planning Landing Zones in a Small Kitchen
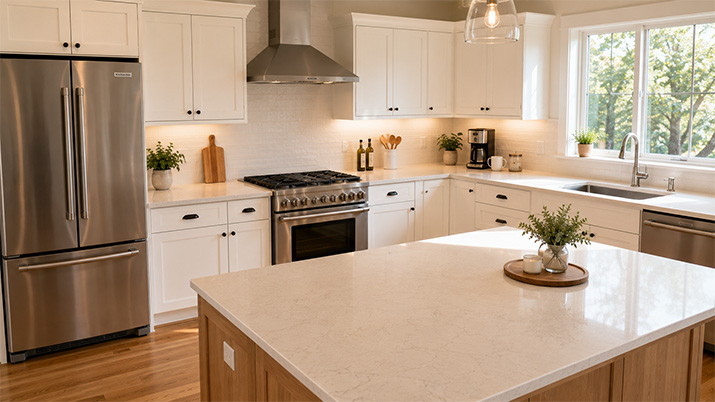
Small kitchens can still support effective landing zones. You need every surface to work a little harder without overcrowding the space. Use this checklist as you plan your layout:
Add a narrow pull-out work surface. A pull-out shelf beside a microwave, oven, or refrigerator creates temporary landing space when you need it and tucks away when you don’t.
Keep one section of countertop appliance-free. Reserve a clear stretch of counter for grocery unloading, meal prep, or serving instead of filling every inch with small appliances and decor.
Use a movable cart when extra space is needed. A rolling cart can serve as additional prep space, a grocery drop zone, or a beverage station. This is especially helpful in one-wall or galley layouts where continuous counter space is limited.
Reassign cabinet storage to free up the countertop. Move infrequently used items into upper cabinets or pantry storage so everyday appliances can be put away after use, keeping the surface clear for landing zones when you need them.
Map your daily routine before finalizing the layout. Before you measure your kitchen or approve a floor plan, spend five minutes walking through the routines your kitchen needs to support. Trace the path of making breakfast, preparing dinner, unloading groceries, cleaning up, and packing lunch. Notice where items naturally pile up. Those spots usually reveal a missing landing surface or poorly placed storage.
When you’re ready to plan the whole room, our free 3D kitchen design service can map your landing zones alongside your cabinet layout, appliance placement, and storage so everything works together before you order anything. And if you want to see a finish in person before committing, order a few door samples to compare against your countertops and flooring.
Frequently Asked Questions
What is a landing zone in a kitchen?
A landing zone is a nearby countertop, shelf, or pull-out surface where items can be set down safely during a task. Its usefulness comes from being close to the appliance or activity it supports, not from size alone.
Is a kitchen landing zone the same as a work triangle?
No. The work triangle describes movement between the refrigerator, sink, and cooking area. A landing zone is a smaller surface placed beside a specific appliance or task. A kitchen can follow the work triangle and still lack proper landing zones if there isn’t enough clear counter beside each appliance.
How much landing space do you need beside a refrigerator?
NKBA guidelines recommend at least 15 inches of clear counter on the handle side of the refrigerator. If that isn’t possible, 15 inches of counter within 48 inches across from the fridge is an acceptable alternative. Ideally, the surface should be reachable without crossing a walkway while carrying groceries.
How much counter space do you need beside a range or cooktop?
At least 12 inches on one side and 15 inches on the other. If the cooktop is in an island, add 9 inches of counter behind the cooking surface at the same height to catch splatter and provide a place for lids and utensils.
Where should a landing zone go near an oven?
Beside the oven or directly across from it, as long as you don’t have to carry hot cookware through a busy traffic path. For side-swing ovens, place the landing surface on the latch side so you’re not reaching over the open door.
Does a microwave need landing space?
Yes. At least 15 inches of clear counter beside or below the microwave. If it’s built into a tall cabinet, a pull-out shelf directly beneath it works well. You need somewhere to set hot dishes immediately.
Can two appliances share a landing zone?
Yes. When two appliances sit next to each other, the guideline is to take the larger of the two landing zone requirements and add 12 inches. So a fridge (15 inches) beside a range (15 inches) would need a shared zone of at least 27 inches.
Can a small kitchen have effective landing zones?
Yes. Pull-out shelves, rolling carts, peninsula ends, and short clear sections of countertop can all serve as landing zones. The key is keeping at least one section of counter appliance-free so there’s always somewhere to set things down during a task.
What shouldn’t you store on a landing zone?
Permanent items. Landing zones are meant to be kept clear for active tasks. Small appliances, mail, decorative items, and clutter turn a landing zone into a storage shelf and defeat its purpose. Give those items designated storage spots elsewhere.
How do you plan landing zones during a kitchen remodel?
Walk through your daily routines (cooking, groceries, cleanup, coffee, lunches) and note where items naturally pile up. Those spots reveal missing landing surfaces. Then check each major appliance against the NKBA clearance guidelines (15 inches for the fridge, 12-15 for the range, 15 for ovens and microwaves) and size your countertops accordingly during the cabinet layout phase.

Andrew Saladino
Andrew Saladino co-founded Kitchen Cabinet Kings in 2010, and the company has since delivered cabinets for more than 110,000 kitchens. Named to the NKBA 30 Under 30 in 2013 and 2014, he writes about cabinet styles, construction, finishes, costs, lead times, and the ordering details that are easy to miss until the cabinets arrive.