

17 Ways to Make the End of a Kitchen Cabinet Run More Useful

by Andrew Saladino
September 7, 2026
The end of a cabinet run is easy to overlook. It sits in full view at the end of an island, a peninsula, or a row of base cabinets, yet it often winds up as a blank panel.
With enough room, that side can hold a towel bar, a spice ledge, a charging shelf, or even a broom cabinet. What fits depends almost entirely on a number most people never measure.
Measure the available depth first, especially if the cabinet borders a walkway.
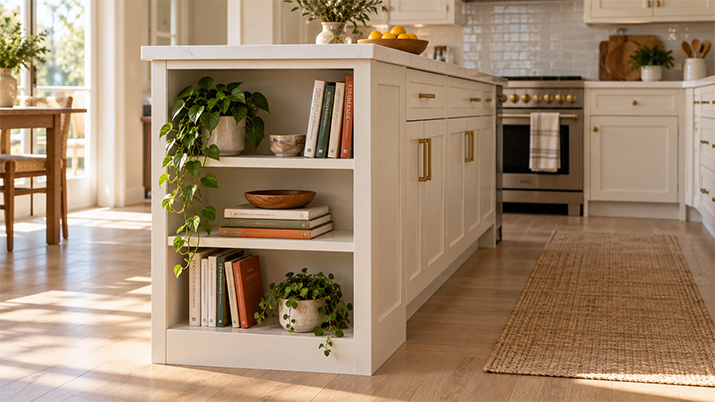
The Short Answer Measure the open space beyond the cabinet end, then subtract the aisle clearance you need to keep. Under 2 inches works for hooks, a towel bar, a peg rail, or a message board. Two to 8 inches fits shallow shelves for spices, mail, cookbooks, or a charging station. Nine inches or more can accommodate deeper built-ins such as a pet station or broom cabinet. If the end already borders a tight or busy walkway, leave it as a clean finished panel.
How Much Depth Do You Have?
Every idea below depends on one measurement: the usable space beyond the cabinet end.
Start with what’s already there. A standard base cabinet is 24 inches deep. The countertop runs 25 to 26 inches, so it overhangs the box by an inch or so. A finished end panel adds anywhere from a quarter inch for a thin cabinet skin to a full inch for a decorative door-style panel. So your starting face is roughly 25 inches out from the wall, and anything you add projects from there.
Now measure the other direction. From the face of that panel to the nearest obstruction, whether that’s an opposite counter, a wall, a doorway, or the path people walk through. That number is what you’re working with, minus whatever walkway you need to protect.
The NKBA planning guidelines call for 42 inches of work aisle in a one-cook kitchen and 48 inches when two people cook together, with 36 inches as the minimum for a general walkway. Subtract that from your measurement and what’s left is your honest depth budget.
If you have 46 inches between the cabinet end and the opposite counter, a 6-inch shelf leaves you 40, which is below the one-cook recommendation. A 3-inch spice ledge leaves 43 inches and keeps the aisle comfortable. Same wall, same project, completely different outcome.
Common mistake: Measuring the cabinet side and stopping there. The depth you have available isn’t what fits on the panel, it’s what fits without narrowing the walkway past the point where people start bumping into it. Measure the aisle before you fall in love with an idea.
What Kind of Panel Are You Working With?
Before you hang anything, find out what’s on the side of that cabinet. There are three common answers and they aren’t interchangeable.
| Panel type | What to know |
|---|---|
| Cabinet skin | A thin veneer sheet, usually about a quarter inch, glued or pinned over the raw cabinet box. It finishes the side but isn’t meant to support weight, so loaded accessories need to anchor into the cabinet box behind it. |
| Decorative end panel | A door-style panel that matches your cabinet fronts, typically three-quarters of an inch thick with a real frame. This is what most people mean by a finished end panel, and it gives you a sturdier surface for shelves, hooks, or trim. |
| Furniture-style end | Applied molding, raised panels, and sometimes decorative legs or a turned post. It’s designed to be seen from across the room, so add storage only where it won’t cover the detail. |
If you’re ordering cabinets now, this is a decision you get to make instead of inherit. Panels come in the same finishes as the doors, and choosing a decorative panel instead of a skin gives you a better base for shelves, hooks, or trim later.
How to Mount Something to a Cabinet End
Half the ideas below involve screwing something into that panel, so it’s worth knowing what’s behind it.
The strongest attachment points are the cabinet’s own structure: the face frame stiles at the front edge and the side of the box itself. A decorative panel sits over that box, so fasteners for anything heavy need to pass through the panel and reach the cabinet side. Screws shouldn’t stop in a thin skin.
If you’re planning shelves and the cabinets aren’t in yet, add blocking. A strip of plywood or a couple of cleats fastened to the cabinet side before the panel goes on gives your screws a solid target later. It also keeps the shelf placement from being limited to wherever the stiles happen to line up. Our installation guide covers how the boxes go together.
For lightweight additions such as a towel bar, peg rail, or magnetic board, use fasteners rated for the panel material and the weight. Loaded shelves should fasten to the cabinet box, not only the skin or decorative panel.
17 Ideas, Sorted by the Depth They Need
Start with the space you can safely use. These ideas move from nearly flat additions to deeper built-ins, followed by finish treatments that don’t add storage but can make the exposed end feel complete.
Under 2 Inches: Surface-Mounted
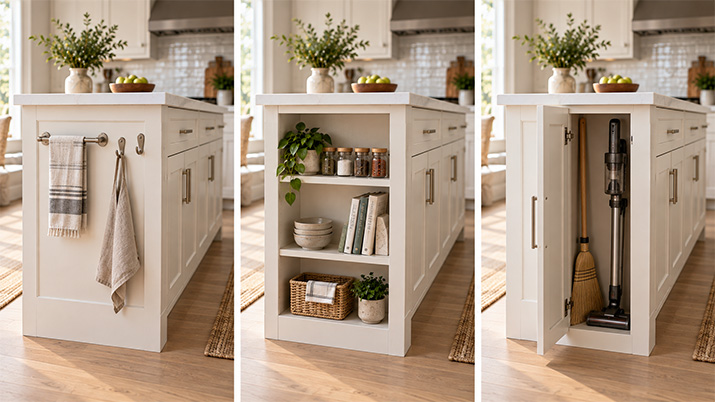
1. Install a Towel Bar
Depth needed: Under 2 inches
This is one of the easiest upgrades on the list. A dish towel on the oven handle gets in the way when you open the oven. On the cabinet end, it’s out of the way and still within reach of the sink.
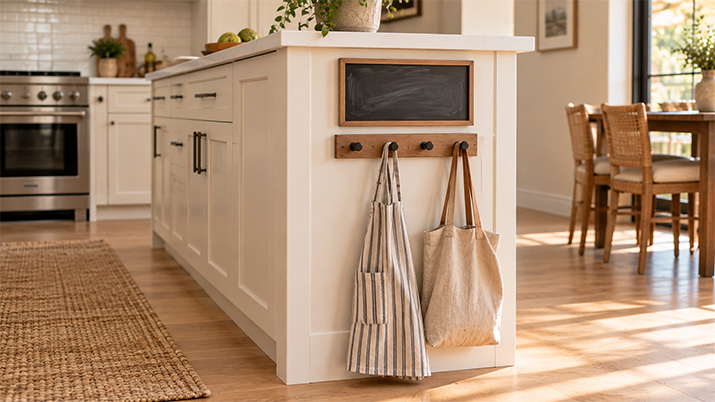
2. Add a Peg Rail or Hooks
Depth needed: Under 2 inches
Aprons, oven mitts, reusable shopping bags, a lightweight basket or two. A peg rail gives you several hanging spots in one strip of wood. If you only need two or three, individual hooks take up less visual space.
3. Build a Family Message Center
Depth needed: Under 2 inches
A magnetic board, chalkboard, corkboard, or dry-erase panel turns the cabinet side into a home for household paperwork. Grocery lists, school forms, the calendar, the permission slip that needs signing. It’s especially useful in a house with kids because it moves all of that off the counter.
4. Mount a Pegboard Panel
Depth needed: Under 2 inches
A pegboard is a peg rail that adapts. Move the hooks as what you store changes, hang measuring cups and small pans, add a small shelf bracket where you need one. Paint it the cabinet color and it reads as built-in rather than garage. A magnetic knife strip does a narrower version of the same trick if your kitchen is short on knife storage.
Two to Eight Inches: Shallow Storage
5. Create a Spice Ledge
Depth needed: 2 to 4 inches
A narrow ledge with a small rail across the front holds a row of spice jars and frees up a drawer. Put it near the range and you’re reaching for cumin without opening anything. Keep it off the wall directly beside the burners, though, since heat and cooking grease are hard on labels and lids.
6. Add a Mail Sorter
Depth needed: 3 to 6 inches
Vertical dividers catch mail, homework, and paperwork before any of it reaches the island. The island is where paper goes to multiply. Intercepting it at the cabinet end is the whole point.
7. Install a Narrow Tray Rack
Depth needed: 4 to 6 inches
Baking sheets, cutting boards, cooling racks, and serving platters never stack neatly inside a cabinet. Vertical dividers on the end of a run store them upright where you can see every one and pull out the one you want without moving the other four.
8. Add Shallow Cookbook Shelves
Depth needed: 4 to 8 inches
Most cookbooks fit on shelves 6 to 8 inches deep, but measure the largest book you want to store before setting the shelf depth. Open shelves keep them near the prep space instead of taking up cabinet room, and a row of spines looks better on display than most of what ends up on a kitchen counter.
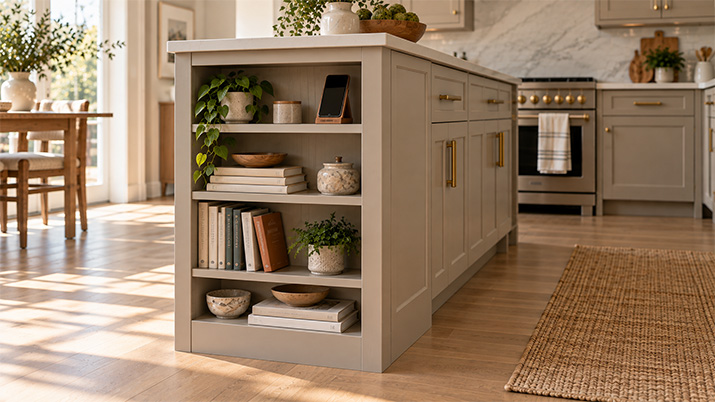
9. Build a Charging Shelf
Depth needed: 4 to 8 inches
A small shelf with an outlet behind it gives phones and tablets somewhere to live that isn’t the counter. Run the outlet inside or behind the shelf so the cords stay out of sight, and add a shallow lip so a phone doesn’t slide off. Nobody wants a charging station that looks like a nest of cables.
The wiring is the part that needs planning. Adding an outlet to a cabinet end means opening the panel and running a circuit, which is much easier before the cabinets are installed than after.
10. Add a Display Niche
Depth needed: 6 to 8 inches
Open shelving for the things you like looking at. Pottery, a stack of bowls, a plant, seasonal pieces. Restraint is what separates a display from a pile, so give each piece room and resist filling every shelf. Two or three objects per shelf reads as deliberate.
11. Fit a Wine Rack
Depth needed: 6 to 8 inches
A wall-mounted wine rack can use a space too shallow for a standard cabinet, but check how far the bottles project before choosing one. Keep it away from the range and the dishwasher vent, since neither heat nor steam does wine any favors.
Nine Inches or More: Built-In Storage
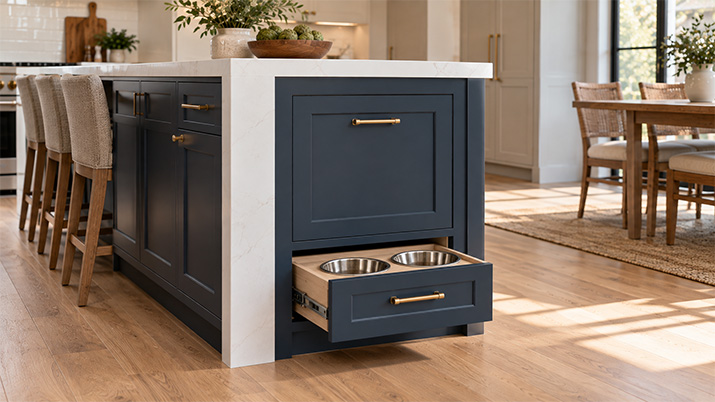
12. Create a Pet-Feeding Station
Depth needed: 9 inches or more
Pull-out bowls tucked into the end of an island or a run get the food and water off the floor and out of the traffic path. Pair it with a drawer or bin for the food itself and the whole operation lives in one place instead of three. It’s one of those details that seems fussy until you’ve lived with a bowl you kick every morning.
13. Add a Broom and Cleaning Nook
Depth needed: 9 inches or more
A narrow full-height cabinet holds a broom, a dustpan, a mop, and a cordless vacuum upright. Cleaning gear is awkward to store, so using a deep cabinet end for it can free up a closet and clear a crowded corner.
14. Build a Breakfast-Bar Support Panel
Depth needed: 9 inches or more
If your counter has an overhang for seating, it may need additional support. An end panel can hide that support better than exposed steel brackets, and it may also leave room for shallow shelves on the seating side.
Any Depth: Finish Treatments
Sometimes the right answer is to make the panel look good and leave it alone.
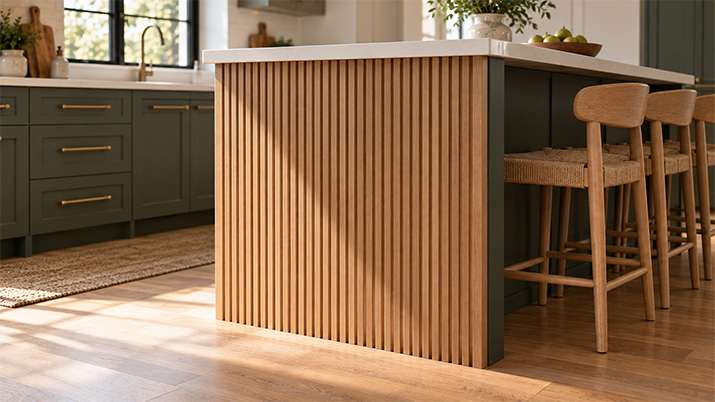
15. Install Decorative Slats
Depth needed: Any
Vertical wood slats add texture and warmth to a flat painted panel without projecting more than half an inch. They work particularly well on an island end that’s visible from the living space.
16. Use a Furniture-Style End Panel
Depth needed: Any
Applied molding, raised panels, a decorative leg, or a corner post can make an island read more like a piece of furniture than a row of cabinet boxes. It’s the most traditional treatment here and works especially well on a large island.
17. Add a Contrasting Accent Panel
Depth needed: Any
A different wood species, a bolder paint color, beadboard, or a textured material can turn the cabinet end into an accent. This works best when the finish repeats a material or color already in the room. Order a door sample in the contrasting finish so you can see it beside the rest of the kitchen before committing.
Island and Peninsula Ends Are a Different Problem
An island end is the most visible cabinet end in the house, and it plays by different rules than a run against a wall.
Traffic moves around two or three sides of it instead of one, so anything that projects takes up more of the room. The panel is also likely to be seen from the living space, which often makes a finished treatment a better choice than open storage. If the counter overhangs for seating, the end may also contain structural support that you shouldn’t cut into.
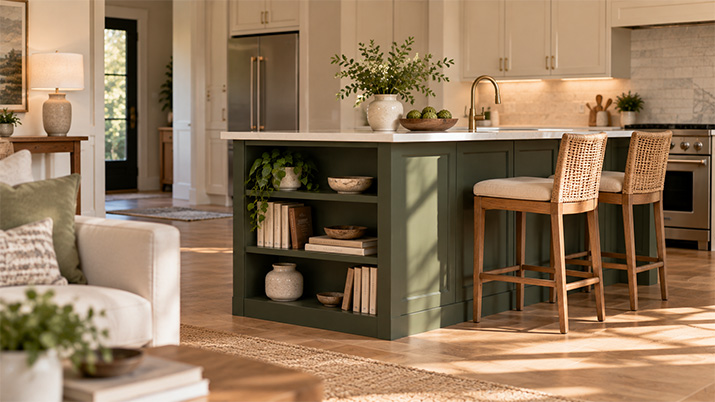
Peninsulas split the difference. One end is anchored to a run, the other is exposed, and the exposed end usually faces a dining area. Shallow shelves facing the dining side work well there, since you’re serving that room rather than the kitchen. A wall end shelf or a base end shelf does the same job as a factory-built piece rather than a retrofit.
For either one, decide before you order and specify a panel finished on every face the room will expose.
What You Can Add Later, and What You Can’t
Roughly half of this list is a weekend. The other half wants to be part of a cabinet order.
Surface-mounted things retrofit easily: hooks, towel bars, peg rails, pegboards, magnetic and chalkboard panels. Shallow shelving and rails retrofit with a bit more care, mostly around finding something solid to screw into. Adding a finished panel over a bare cabinet box is also straightforward, and it’s the upgrade that makes the biggest visual difference for the least work.
Electrical work, cutouts in the cabinet structure, pull-out hardware, and full-height narrow cabinets are much harder to retrofit. Plan those with the cabinet order, while changing a panel or cabinet size is still straightforward.
Mistakes That Make a Cabinet End Look Cluttered
A cabinet end should make the kitchen easier to use, not busier to look at. One or two well-chosen features beat six.
The most common mistake is treating every exposed end as an opportunity. Some of them should stay blank. A clean panel is a finished detail; a panel with a shelf, a hook rail, a basket, and a chalkboard on it is a pegboard nobody meant to build.
Too Many Small Accessories
Several narrow shelves, a few hooks, a basket, and an organizer on one panel add up to visual noise. Pick the one that solves a problem you actually have.
Anything That Projects Into a Walkway
If people brush against it walking through the kitchen, it’s too deep, and no amount of usefulness fixes that. This is what the aisle measurement at the top is for.
Visible Cords and Mismatched Hardware
A charging station with cables hanging off it looks like a repair. Hide the cord, and match the hardware finish to the rest of the kitchen so additions read as original.
Storage Right Beside Heat or Grease
Paper, cookbooks, pet food, and fabric don’t belong directly next to the range. Cooking grease travels further than people expect and it’s hard on anything porous.
Plan the Ends Before You Order
Decide what happens at each exposed cabinet end while you’re still working on the elevations.
Walk through the elevations and mark every side that will be visible when the kitchen is done, including the ones you’d only see from the next room. Specifying a finished panel during the design phase is easier than trying to match the finish after the cabinets are installed.
Then confirm the aisle clearances before you commit to anything that projects, and order matching panels for every exposed side even if you don’t plan to hang anything on them yet. A decorative panel gives you a sturdy, finished surface to work with later. Our measuring guide walks through the dimensions you’ll need, and the cabinet size guide covers how the standard boxes fit together.
If you want to see how other kitchens handle it, our kitchen cabinet ideas gallery has real installations across a range of layouts. Cabinets and matching panels come in both RTA and assembled, and you can browse the full range across our kitchen cabinet collections.
When you’re ready to lay out the room, our free 3D design service will mark the exposed ends for you, so nothing gets missed on the order.
Related reading: if you’re working through the rest of the kitchen, cabinets to the ceiling covers the other end of the same wall.
Frequently Asked Questions
What can I put on the end of a kitchen cabinet?
Shallow shelves, towel bars, cookbook storage, message centers, charging stations, hooks, decorative panels, and narrow storage cabinets all work. The right choice depends on the depth you have and how much walkway you need to protect.
What is a cabinet end panel?
A cabinet end panel covers the exposed side of a cabinet box so it matches your doors and drawer fronts. It hides the unfinished box, gives the run a finished appearance, and provides a solid surface for shelves, hooks, or trim added later.
How do you finish the exposed side of a kitchen cabinet?
Most exposed cabinet sides are covered with a matching finished end panel. Decorative molding, furniture-style trim, wood slats, beadboard, or a contrasting finish can also work when the detail fits the rest of the kitchen.
What’s the difference between a cabinet skin and a decorative end panel?
A skin is a thin veneer sheet, usually about a quarter inch, applied over the cabinet box for appearance. A decorative end panel is a door-style panel around three-quarters of an inch thick with a real frame, giving you a sturdier surface for shelves, hooks, or trim.
Can shelves be added to the side of a kitchen cabinet?
Yes, as long as they’re anchored to something solid and don’t intrude on a walkway. Screws need to reach the cabinet box or its face frame, since a thin cabinet skin won’t hold a loaded shelf on its own.
How much space is needed for an end-of-cabinet shelf?
Two to three inches is enough for a narrow ledge or a spice rail. Cookbooks and trays want 4 to 8 inches. Anything deeper than that starts competing with your walkway, so measure the aisle before you decide.
How much walkway should I leave beside a cabinet end?
The NKBA recommends 42 inches of work aisle in a one-cook kitchen and 48 inches when two people cook together, with 36 inches as a minimum for a general walkway. Measure from the face of anything you add, not from the cabinet box.
Can you add an end panel to existing cabinets?
Yes. The challenge is matching the finish, since cabinet colors can shift over time and discontinued lines may be difficult to match exactly. Order a door sample before committing.
What is a wall end shelf?
A wall end shelf is a factory-made cabinet with open shelving on the end of the run rather than a flat finished side. It gives you display or storage space built into the cabinetry itself, instead of a shelf mounted onto a panel afterward.
Do end panels come with kitchen cabinets?
Usually not. Cabinets are built to sit beside other cabinets, so exposed sides are finished with panels ordered separately. This is why marking every visible side on your elevation before ordering matters so much.
Should cabinet end panels match the doors?
Matching panels give the cabinet run a consistent finish. A contrasting panel can also look excellent when it repeats a color or material already used elsewhere in the room.

Andrew Saladino
Andrew Saladino co-founded Kitchen Cabinet Kings in 2010, and the company has since delivered cabinets for more than 110,000 kitchens. Named to the NKBA 30 Under 30 in 2013 and 2014, he writes about cabinet styles, construction, finishes, costs, lead times, and the ordering details that are easy to miss until the cabinets arrive.